WooCommerce
Step 1: Go to Your Admin Panel in WordPress
-
Open a new browser tab and navigate to your WordPress admin dashboard.
-
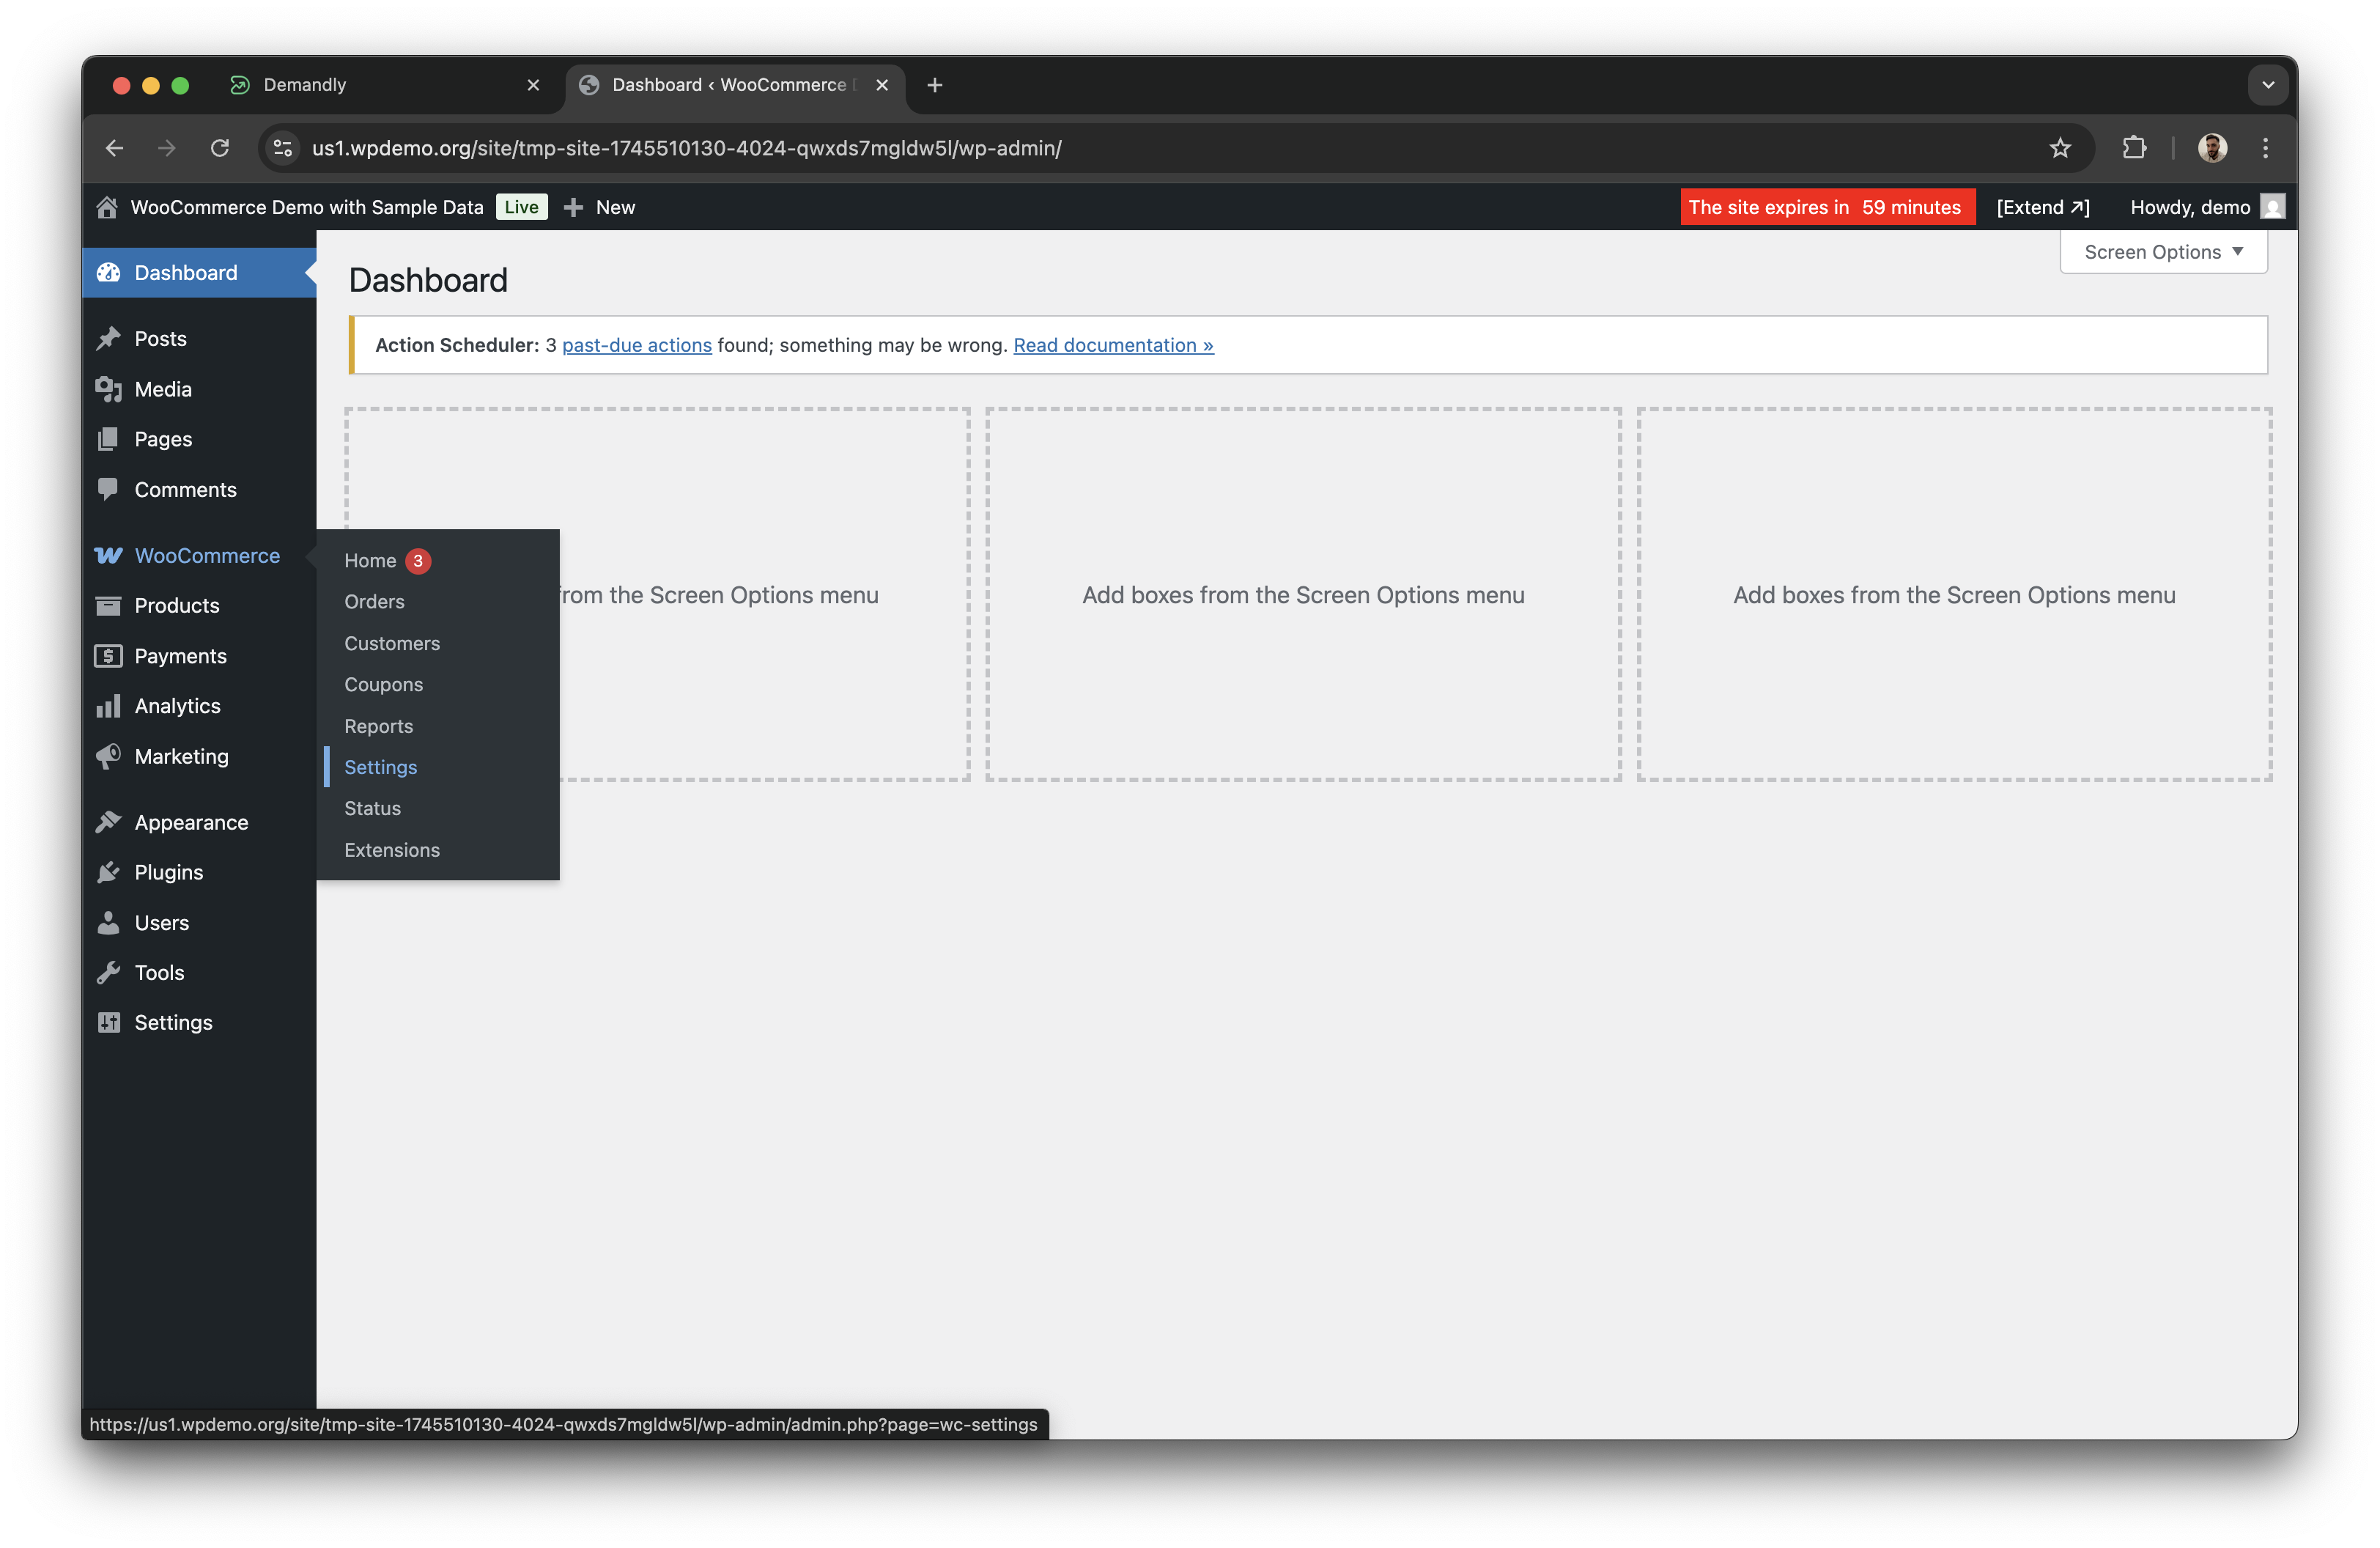
On the left side of your WordPress dashboard, hover your cursor over the “WooCommerce” menu item.
-
In the submenu that appears, click on “Settings”.
Step 2: Create an API Key
-
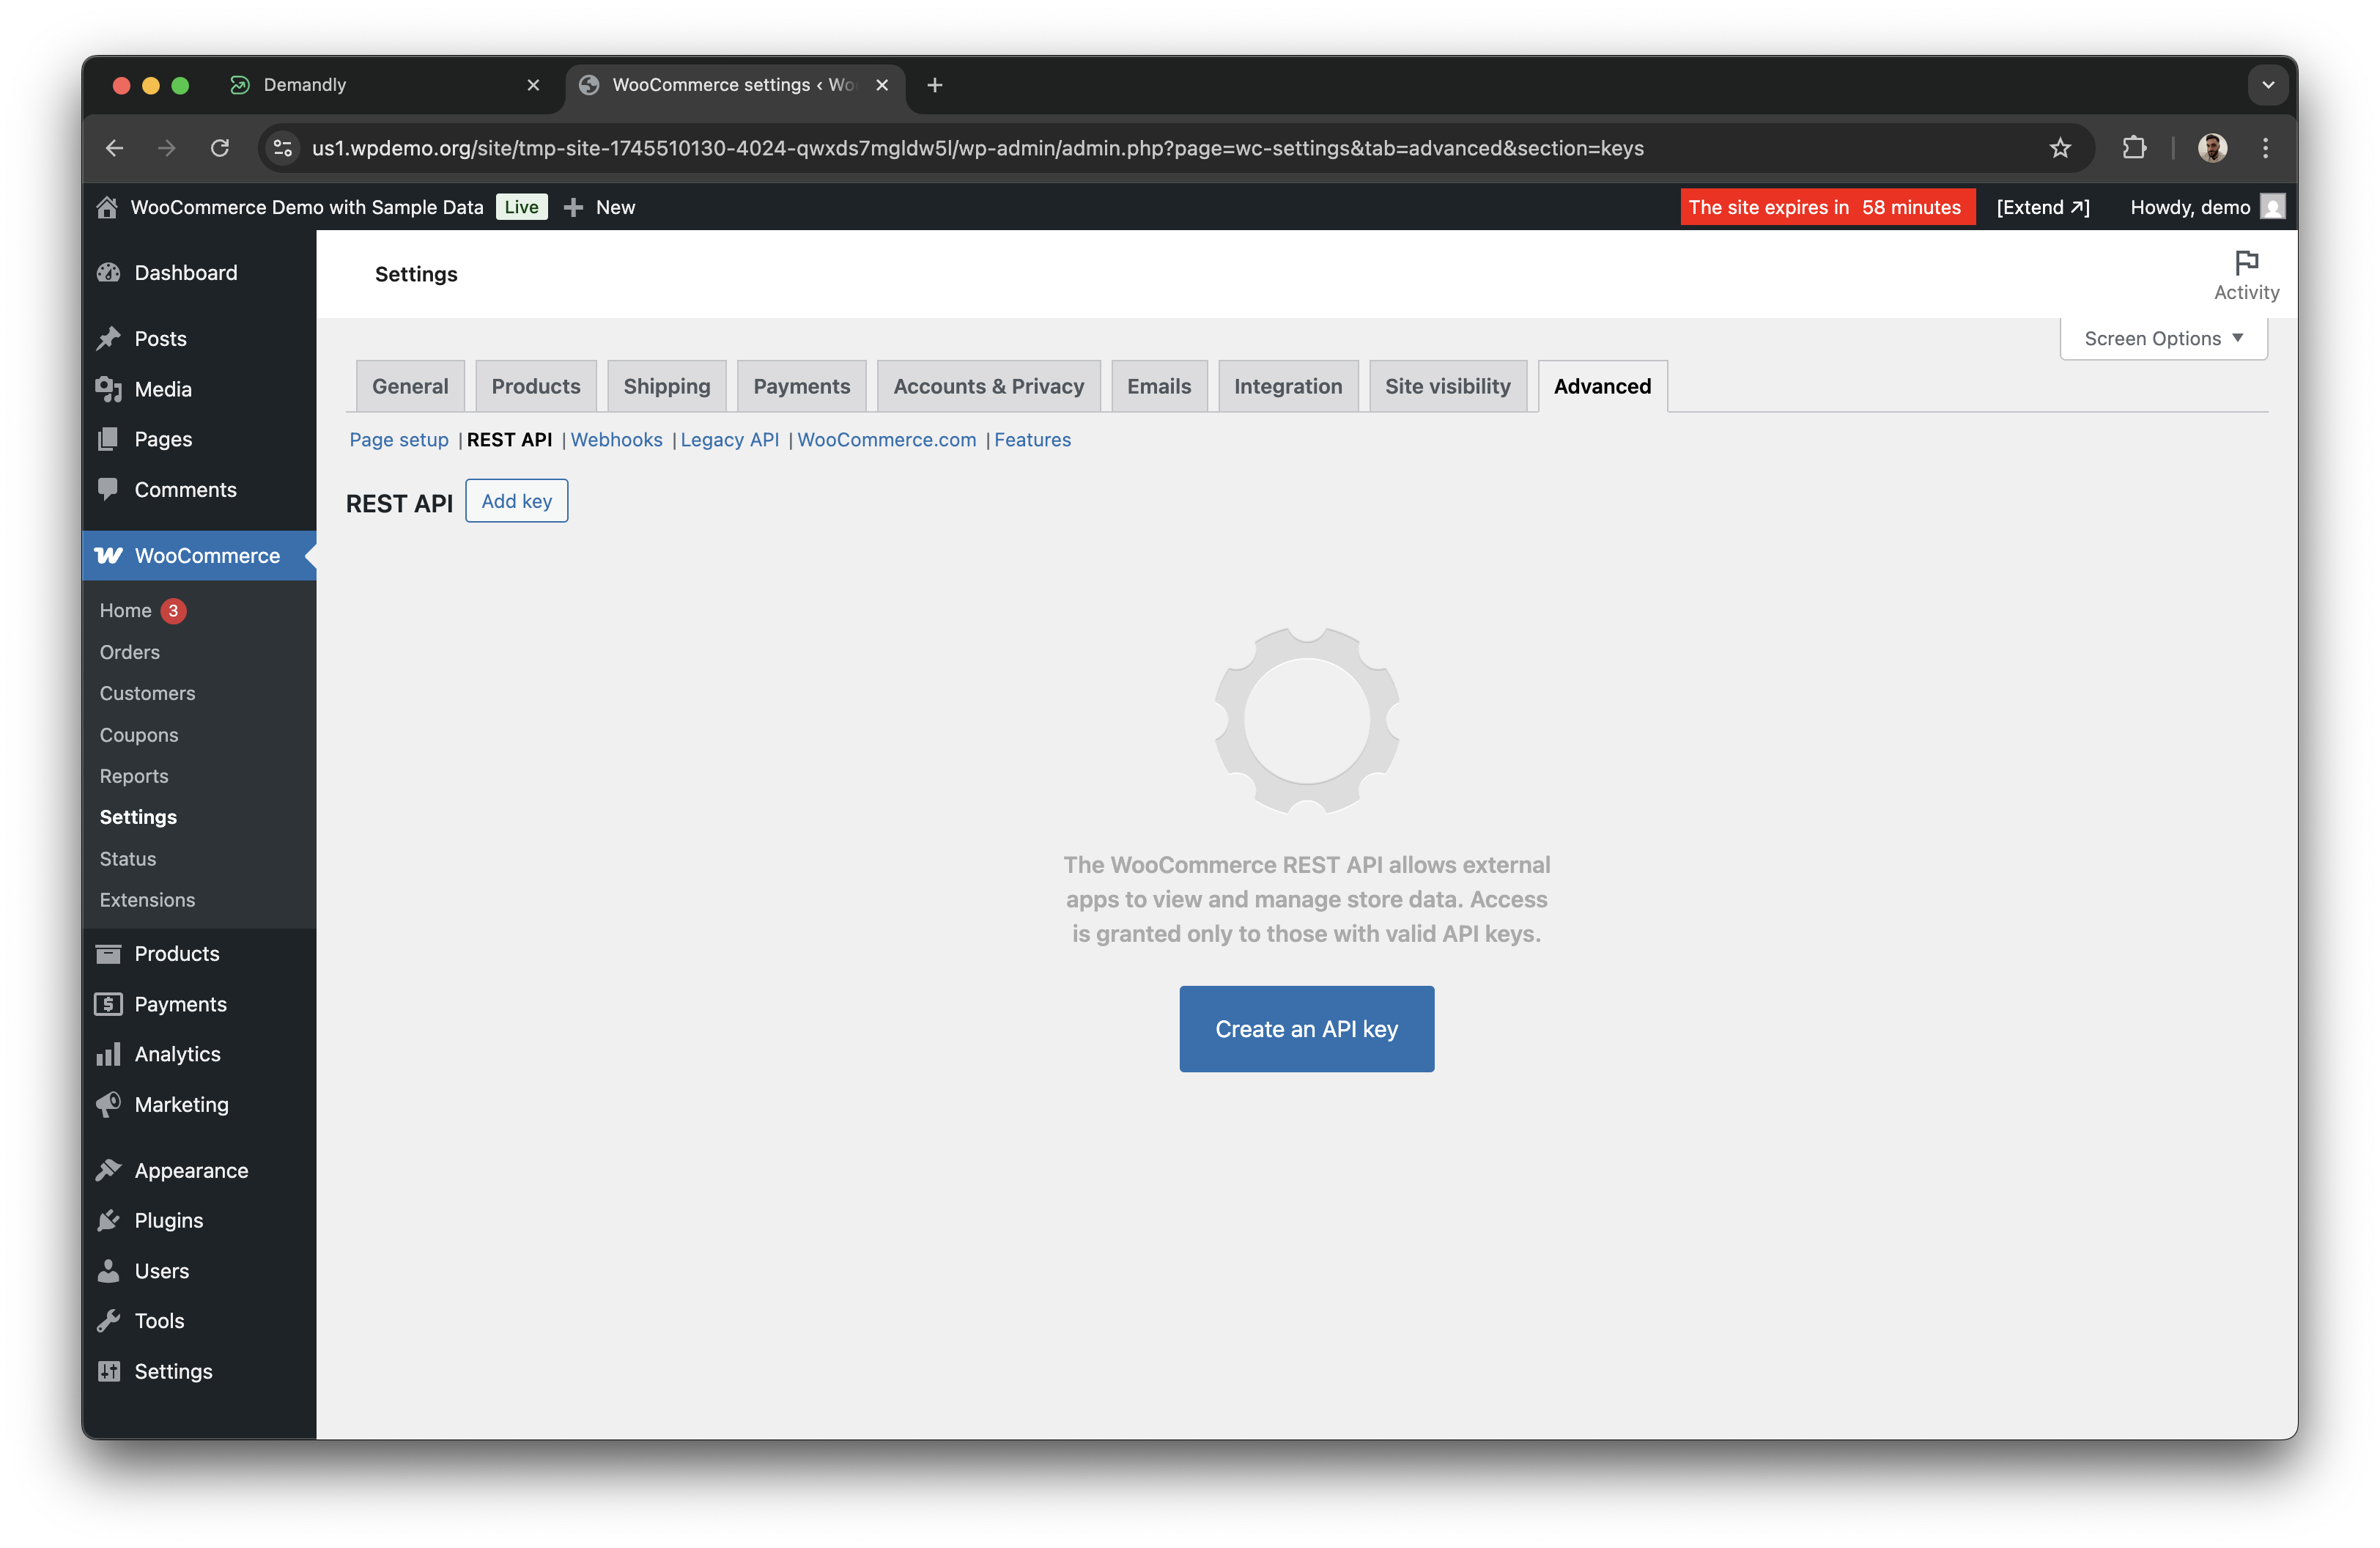
At the top of the Settings page, look for the tabs and click on “Advanced”.
-
Look for the links underneath the tabs at the top of the page and click on “REST API”.
-
Click on the “Create an API Key” button. If you already have existing keys, you may see an “Add Key” button instead.
Step 3: Fill in the Description and Assign a User
-
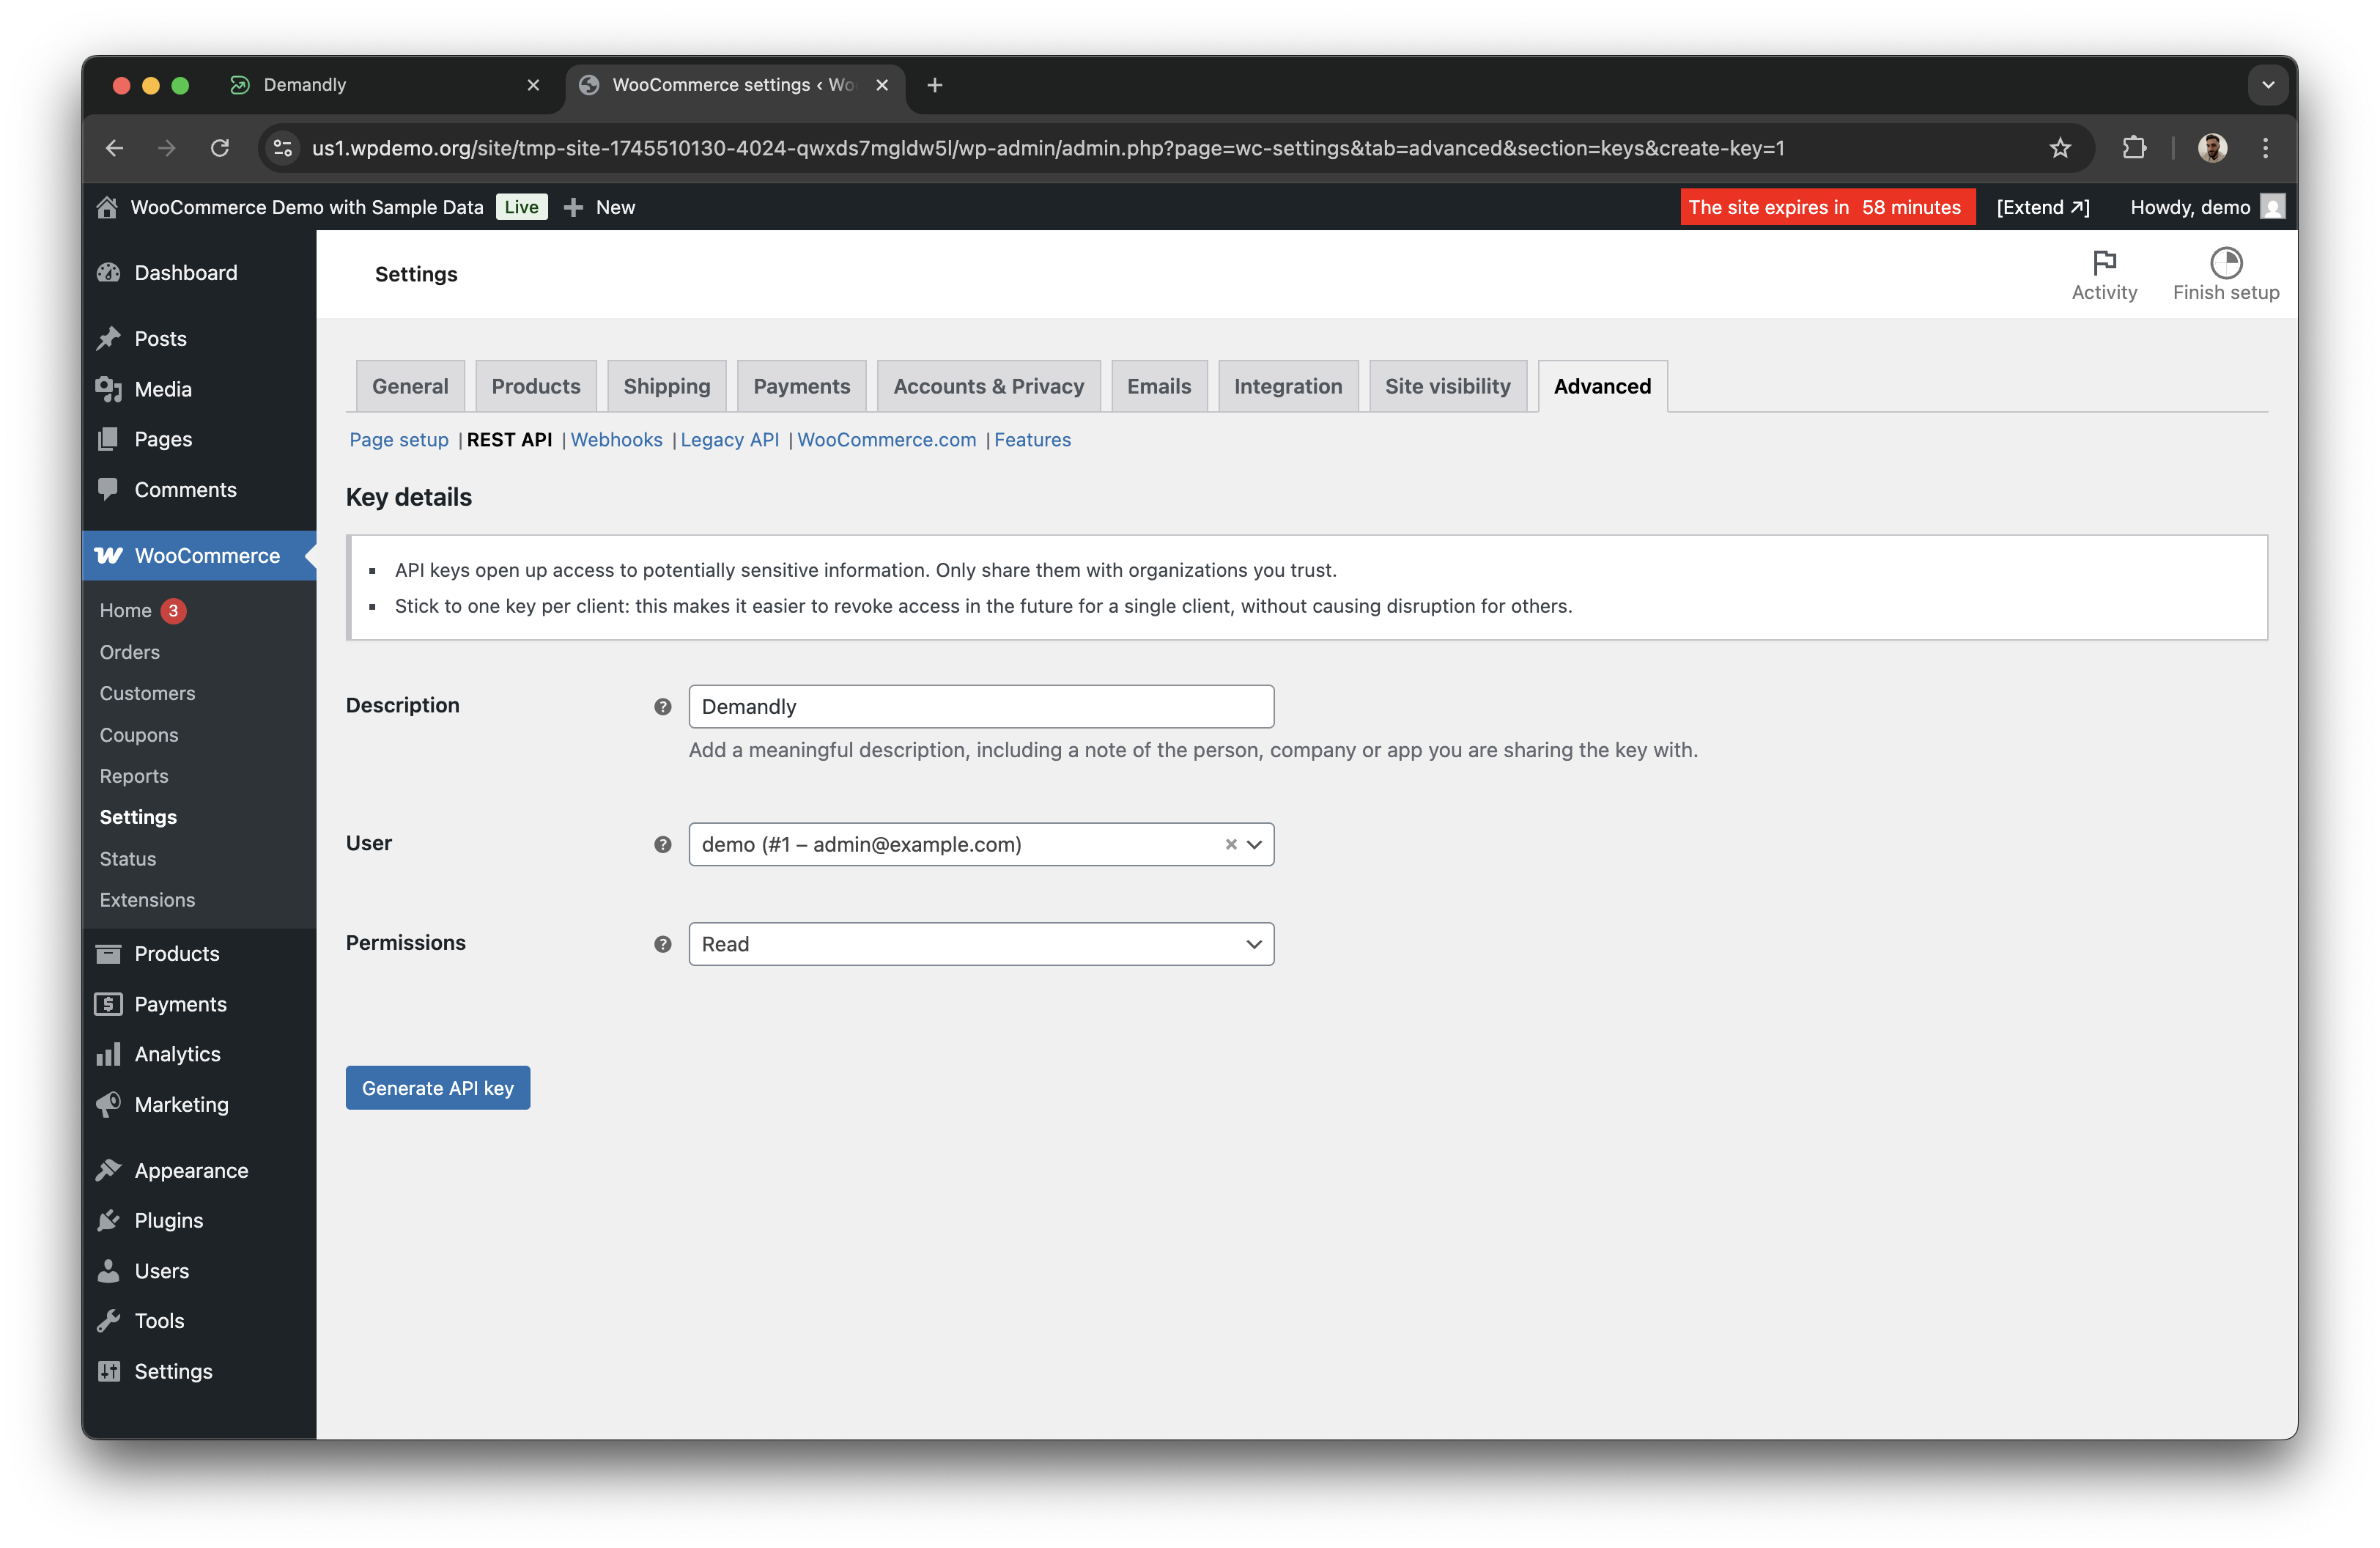
Enter a description for the API key (e.g., “Demandly Integration”) and select a user to associate with this key.
-
You can either use an existing account or create a new user specifically for this integration.
-
In the permissions dropdown, select “Read” to give read-only access.
-
Click the “Generate API Key” button to create your new key.
Step 4: Copy “Consumer Key” and “Consumer Secret”
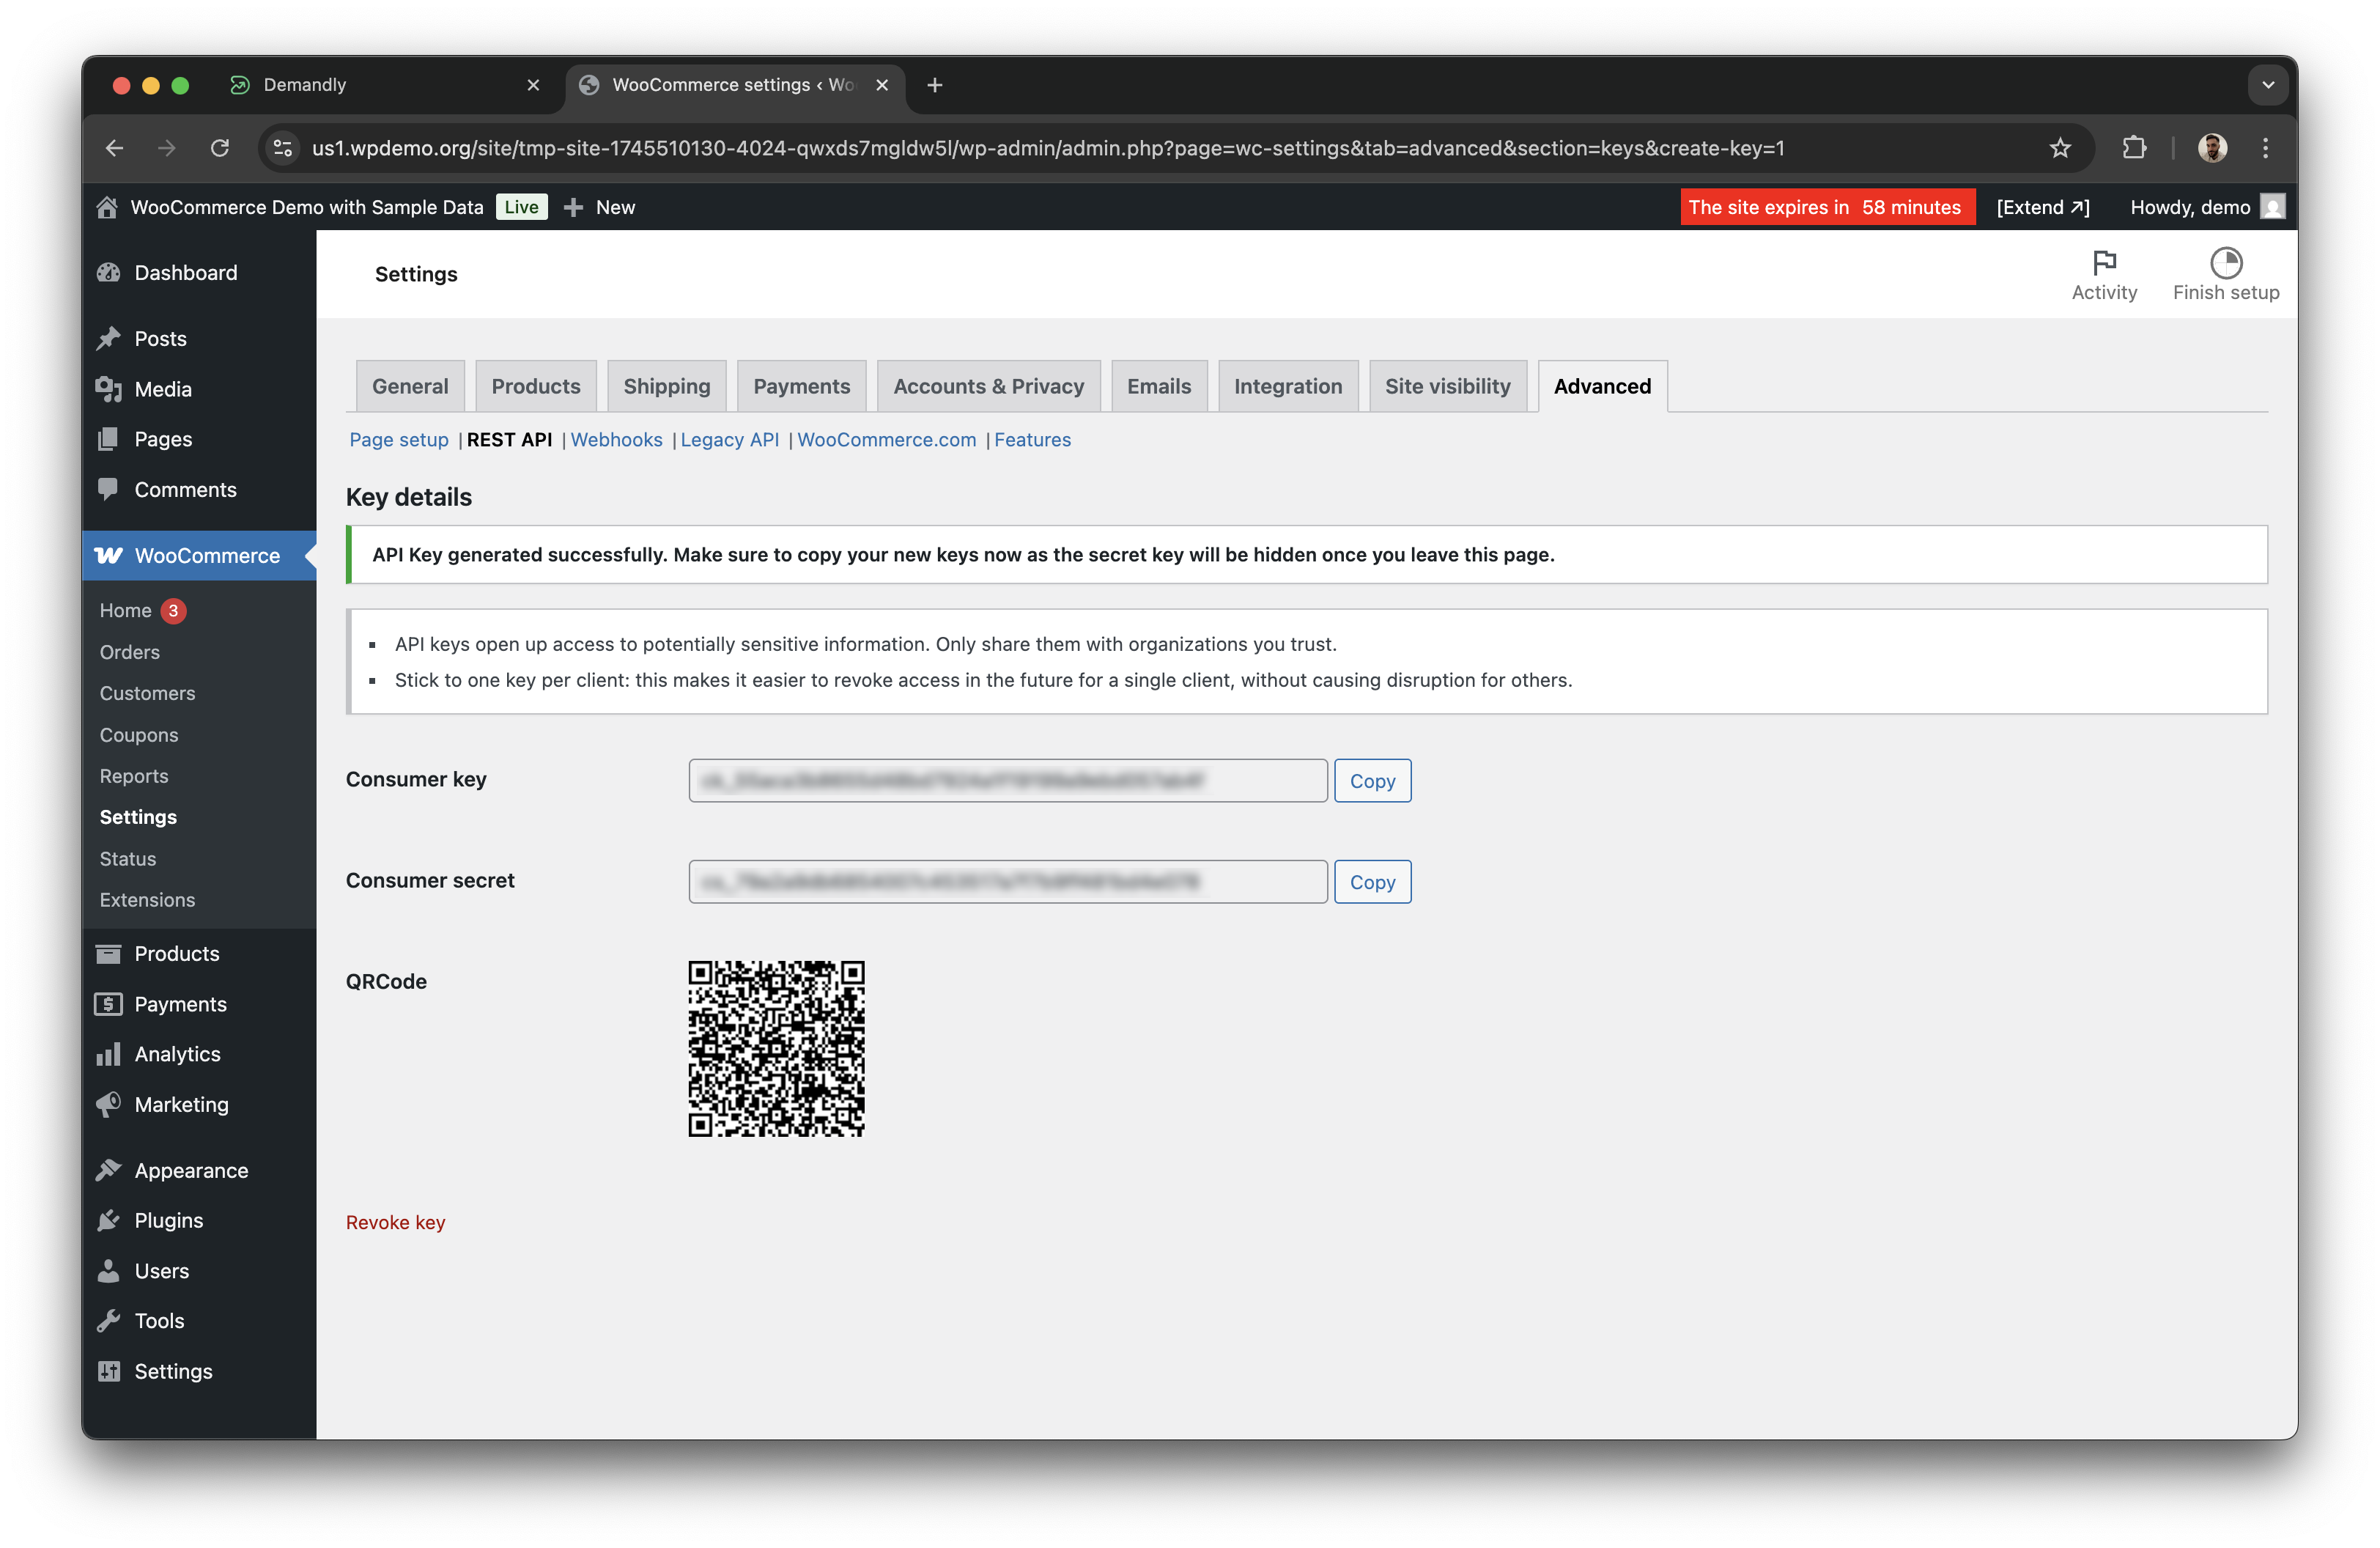
Once generated, copy both the “Consumer Key” and “Consumer Secret” values.
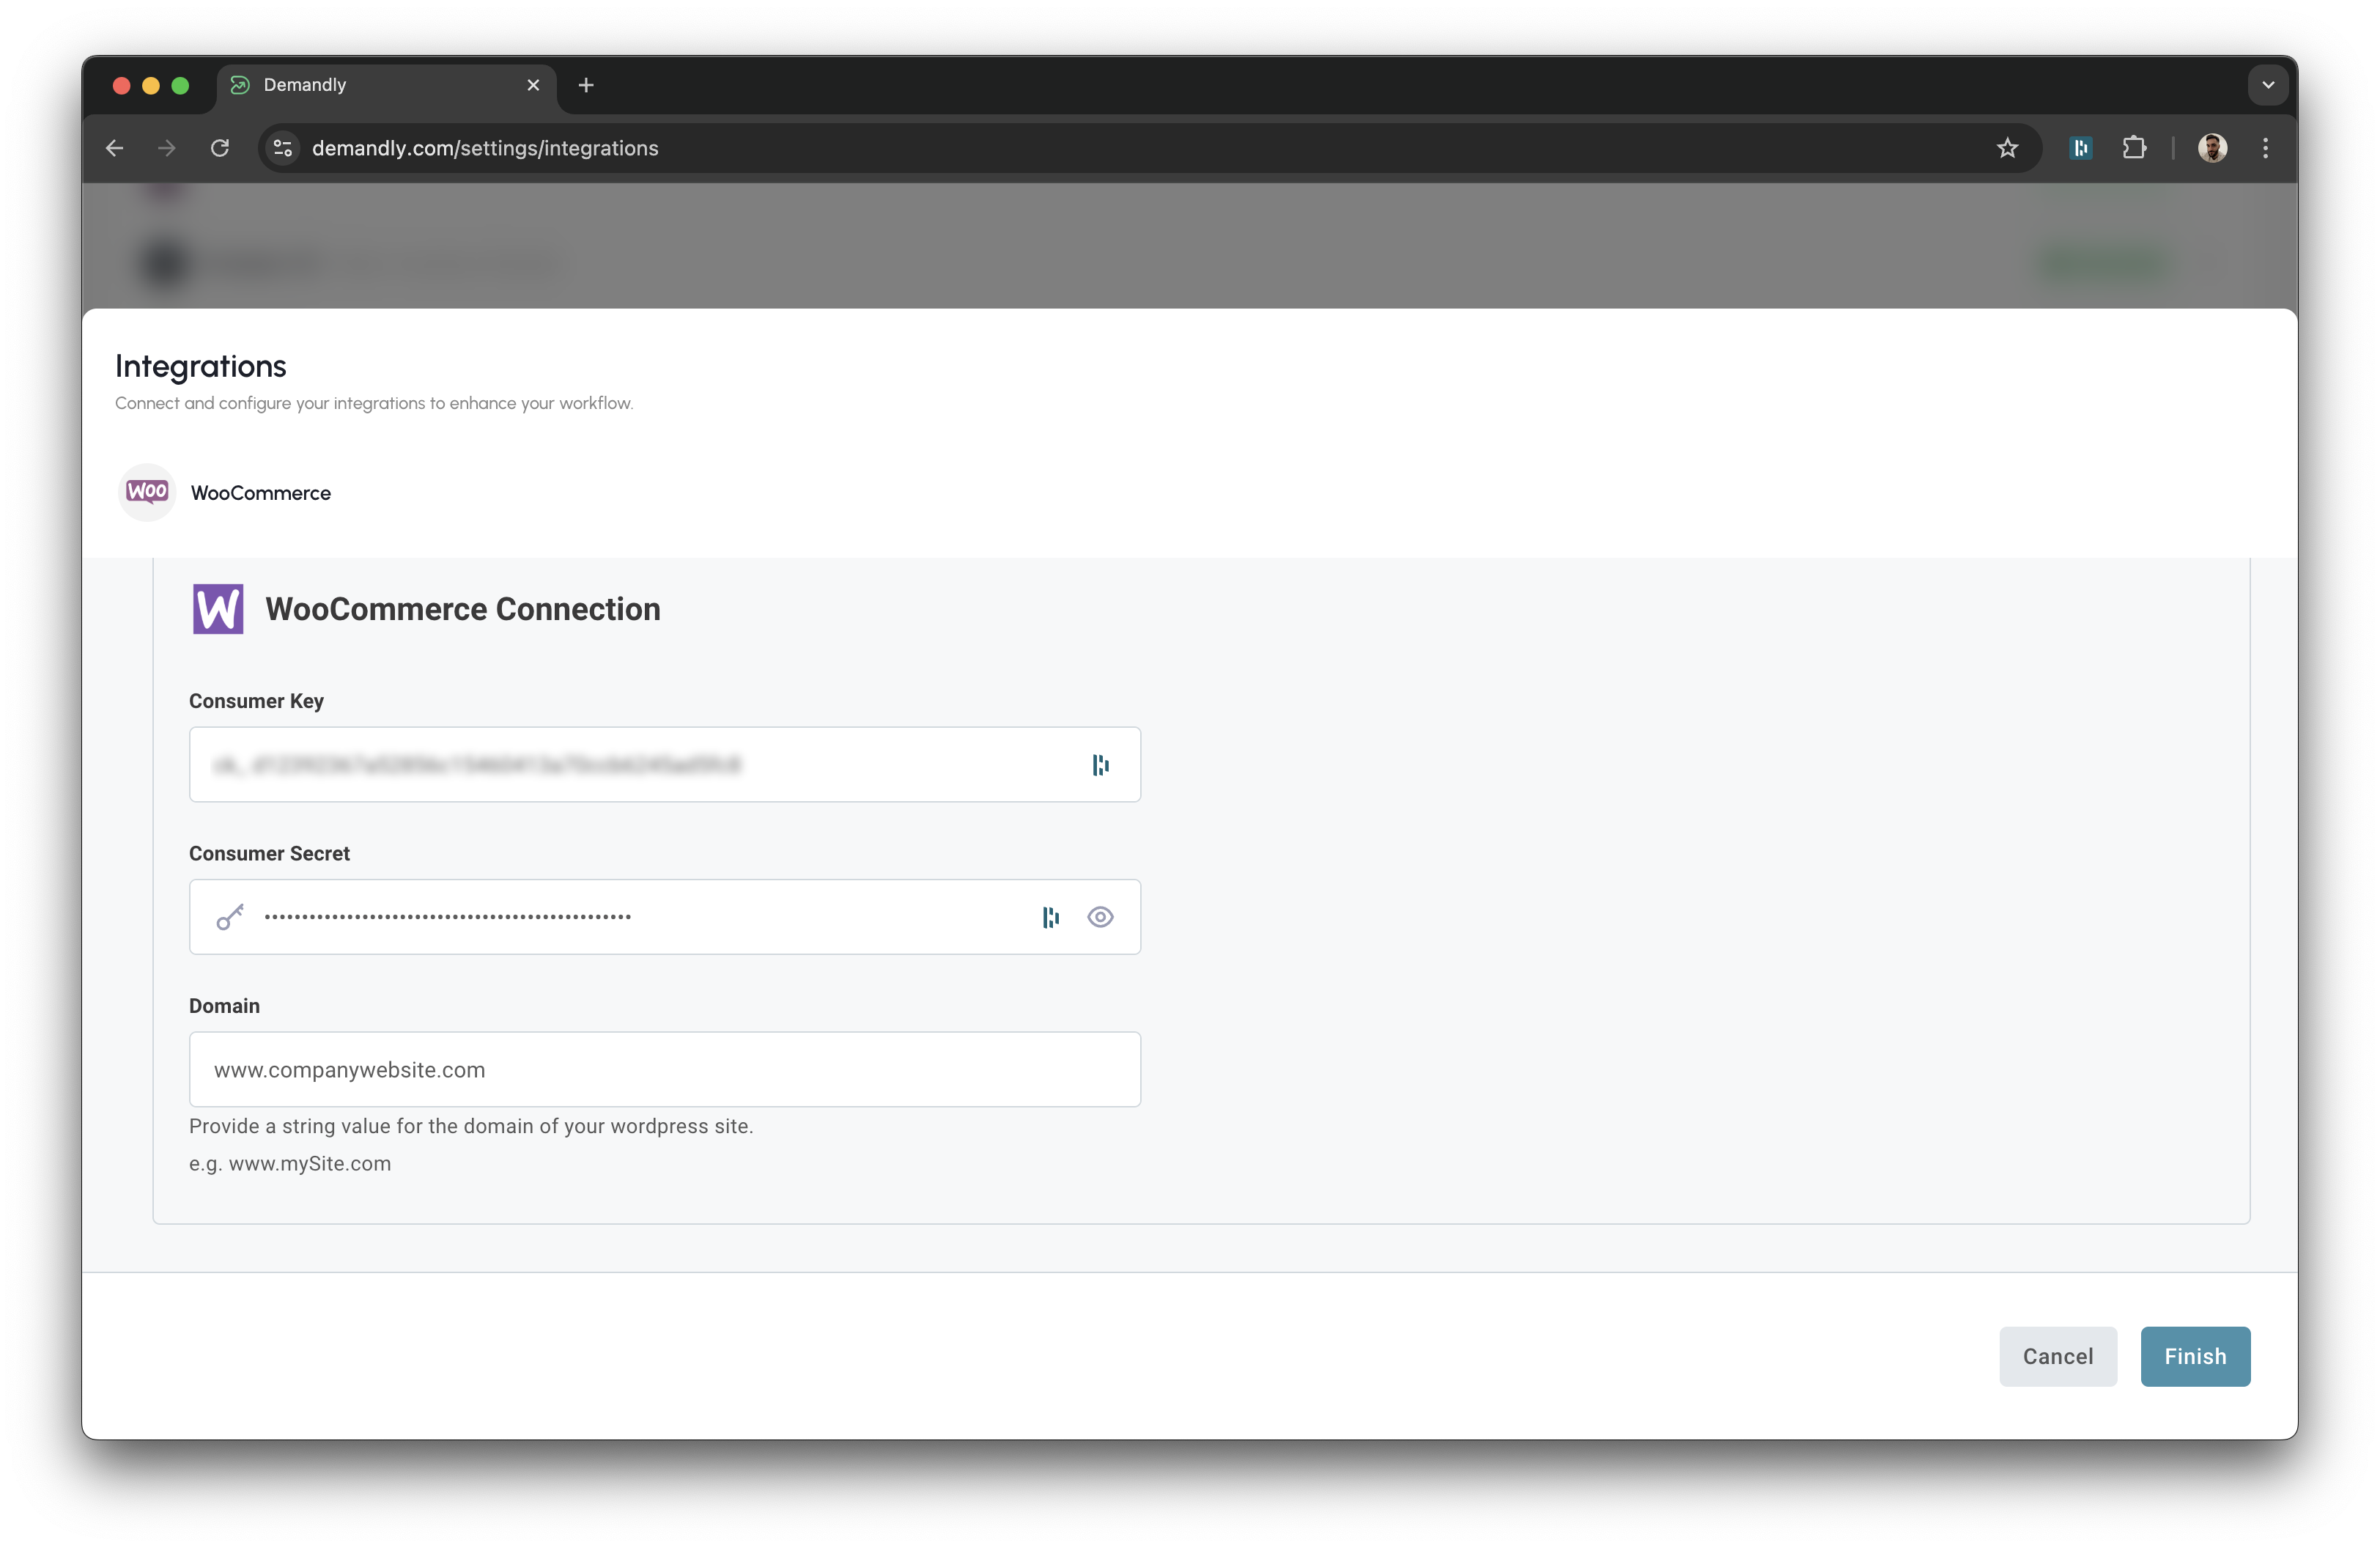
Step 5: Paste Keys into Demandly
Return to the Demandly tab and paste the Consumer Key and Consumer Secret into their respective fields.
Enter your website address in the “Domain” field using the format “www.companysite.com” (without http:// or https://).
Click “Finish” once done
Step 6: Verify Your Integration
You’ll now see a confirmation screen showing your WooCommerce integration status as “Running”. This confirms everything is working properly. Close this window by clicking the X in the top right corner to return to your integrations page.
That’s it! Your Demandly account is now successfully connected to your WooCommerce account.
If you need to make changes to this integration later, you can return to the integrations page and reconfigure or deactivate it as needed.
Need Help?
If you’re experiencing issues with your integration:
- Contact our support team at support@demandly.com