Meta
Step 1: Begin Meta Authentication
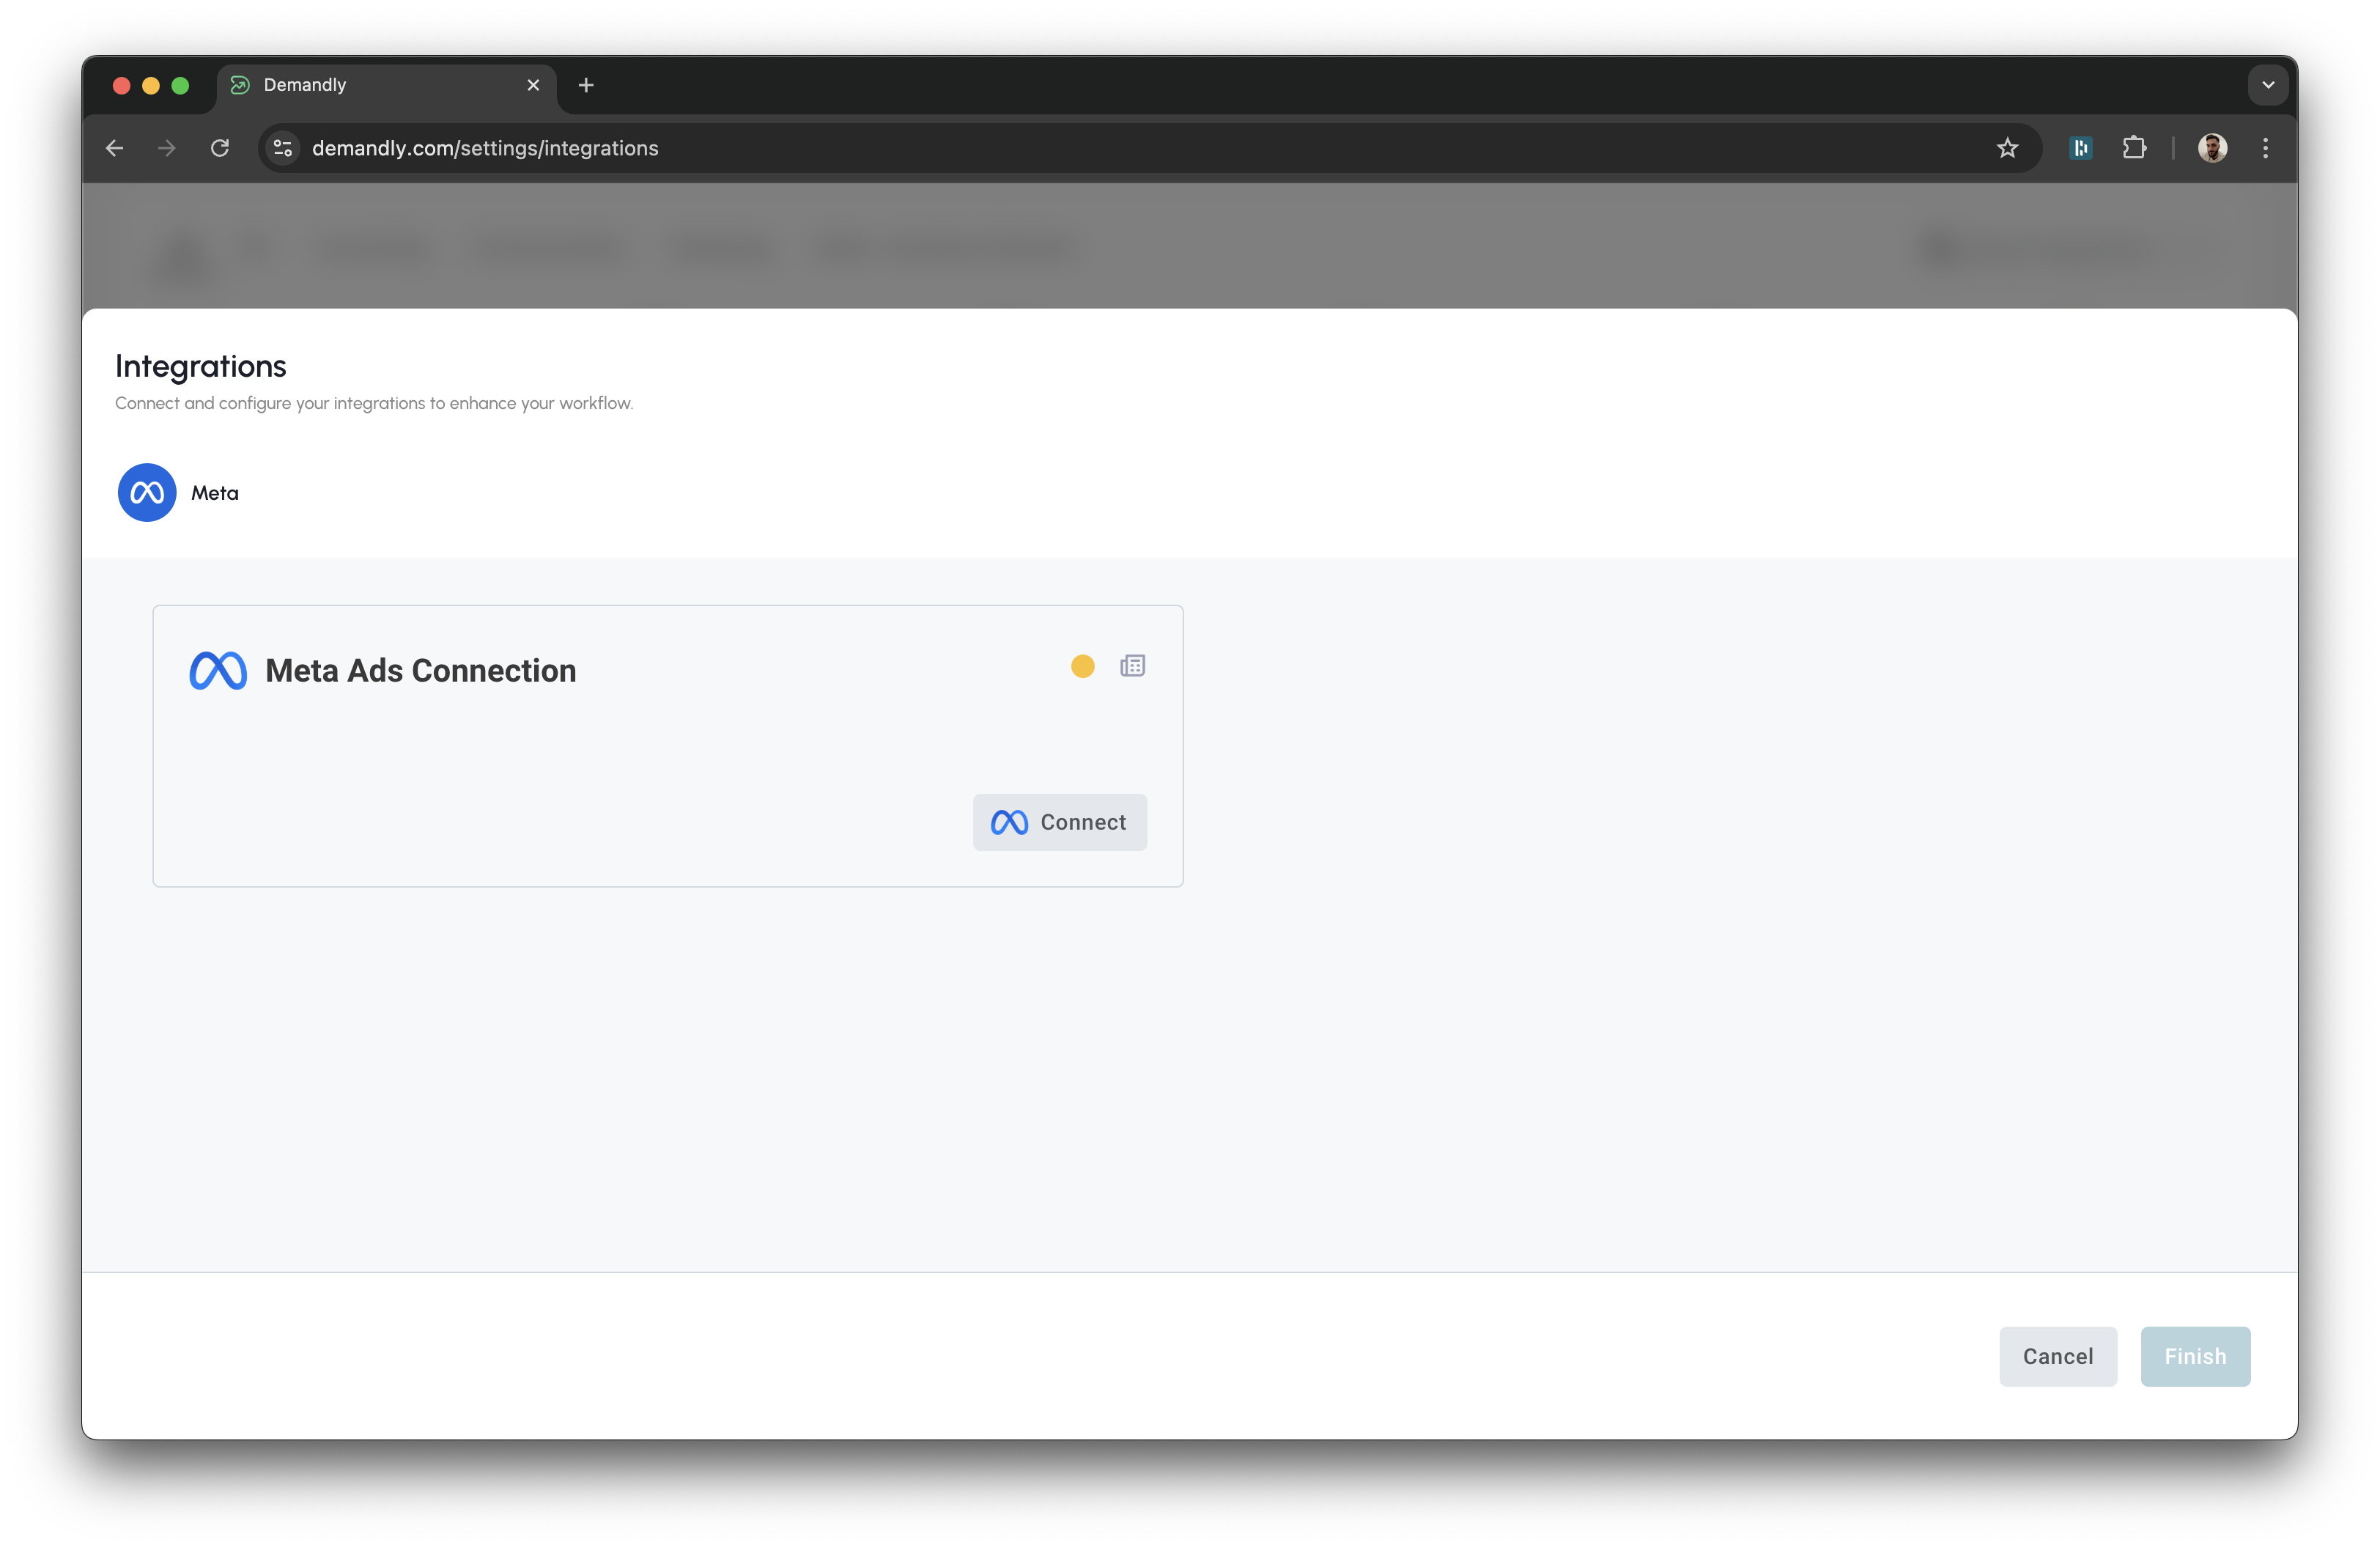
On the Meta Connection screen, you’ll see a button labeled “Connect”. Click this button to start the authentication process with your Meta account.
Step 2: Login to your Meta account
-
A new window will open which will allow you to sign in to your Meta account.
-
Ensure you login to the account which has access to the ads account
-
Once signed in, click on “Continue as Your Name”
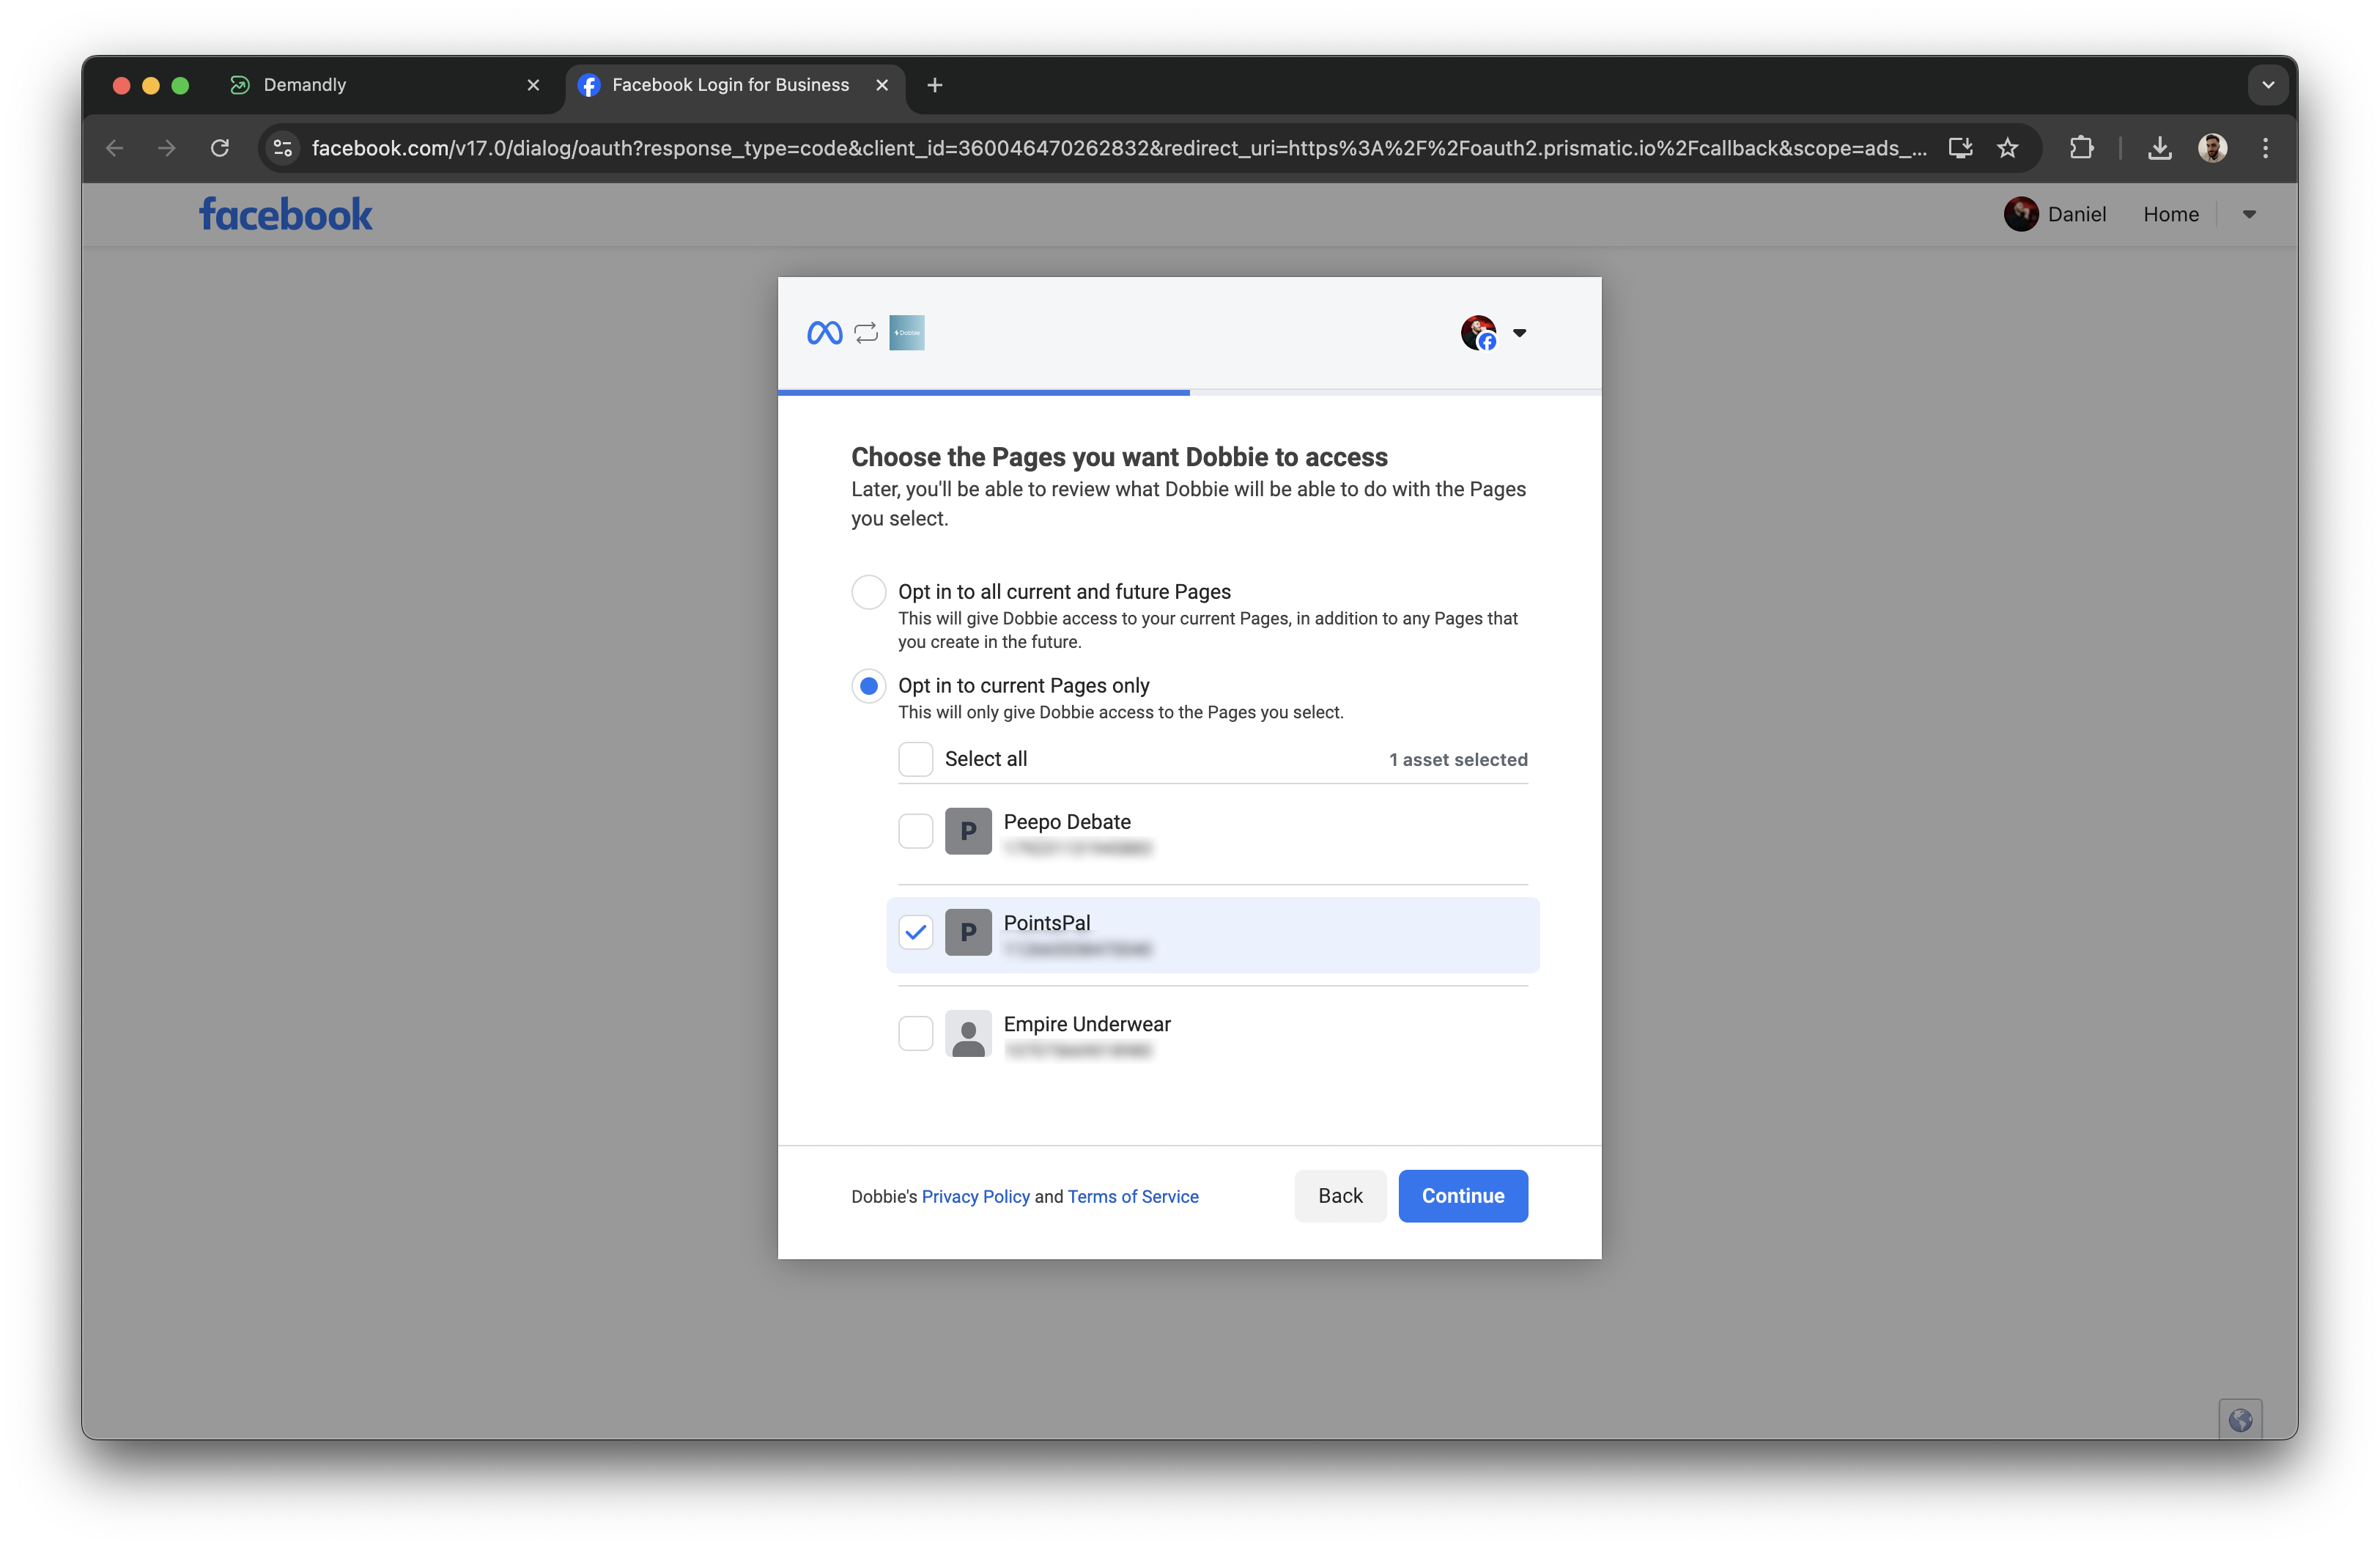
Step 3: Choose the pages you want to allow access to
- Choose whether you want to ‘Opt to all current and future pages’ or ‘Opt in to current Pages only’
Step 4: Choose the business you want to allow access to
Choose whether you want to ‘Opt to all current and future Businesses’ or ‘Opt in to current Businesses only’

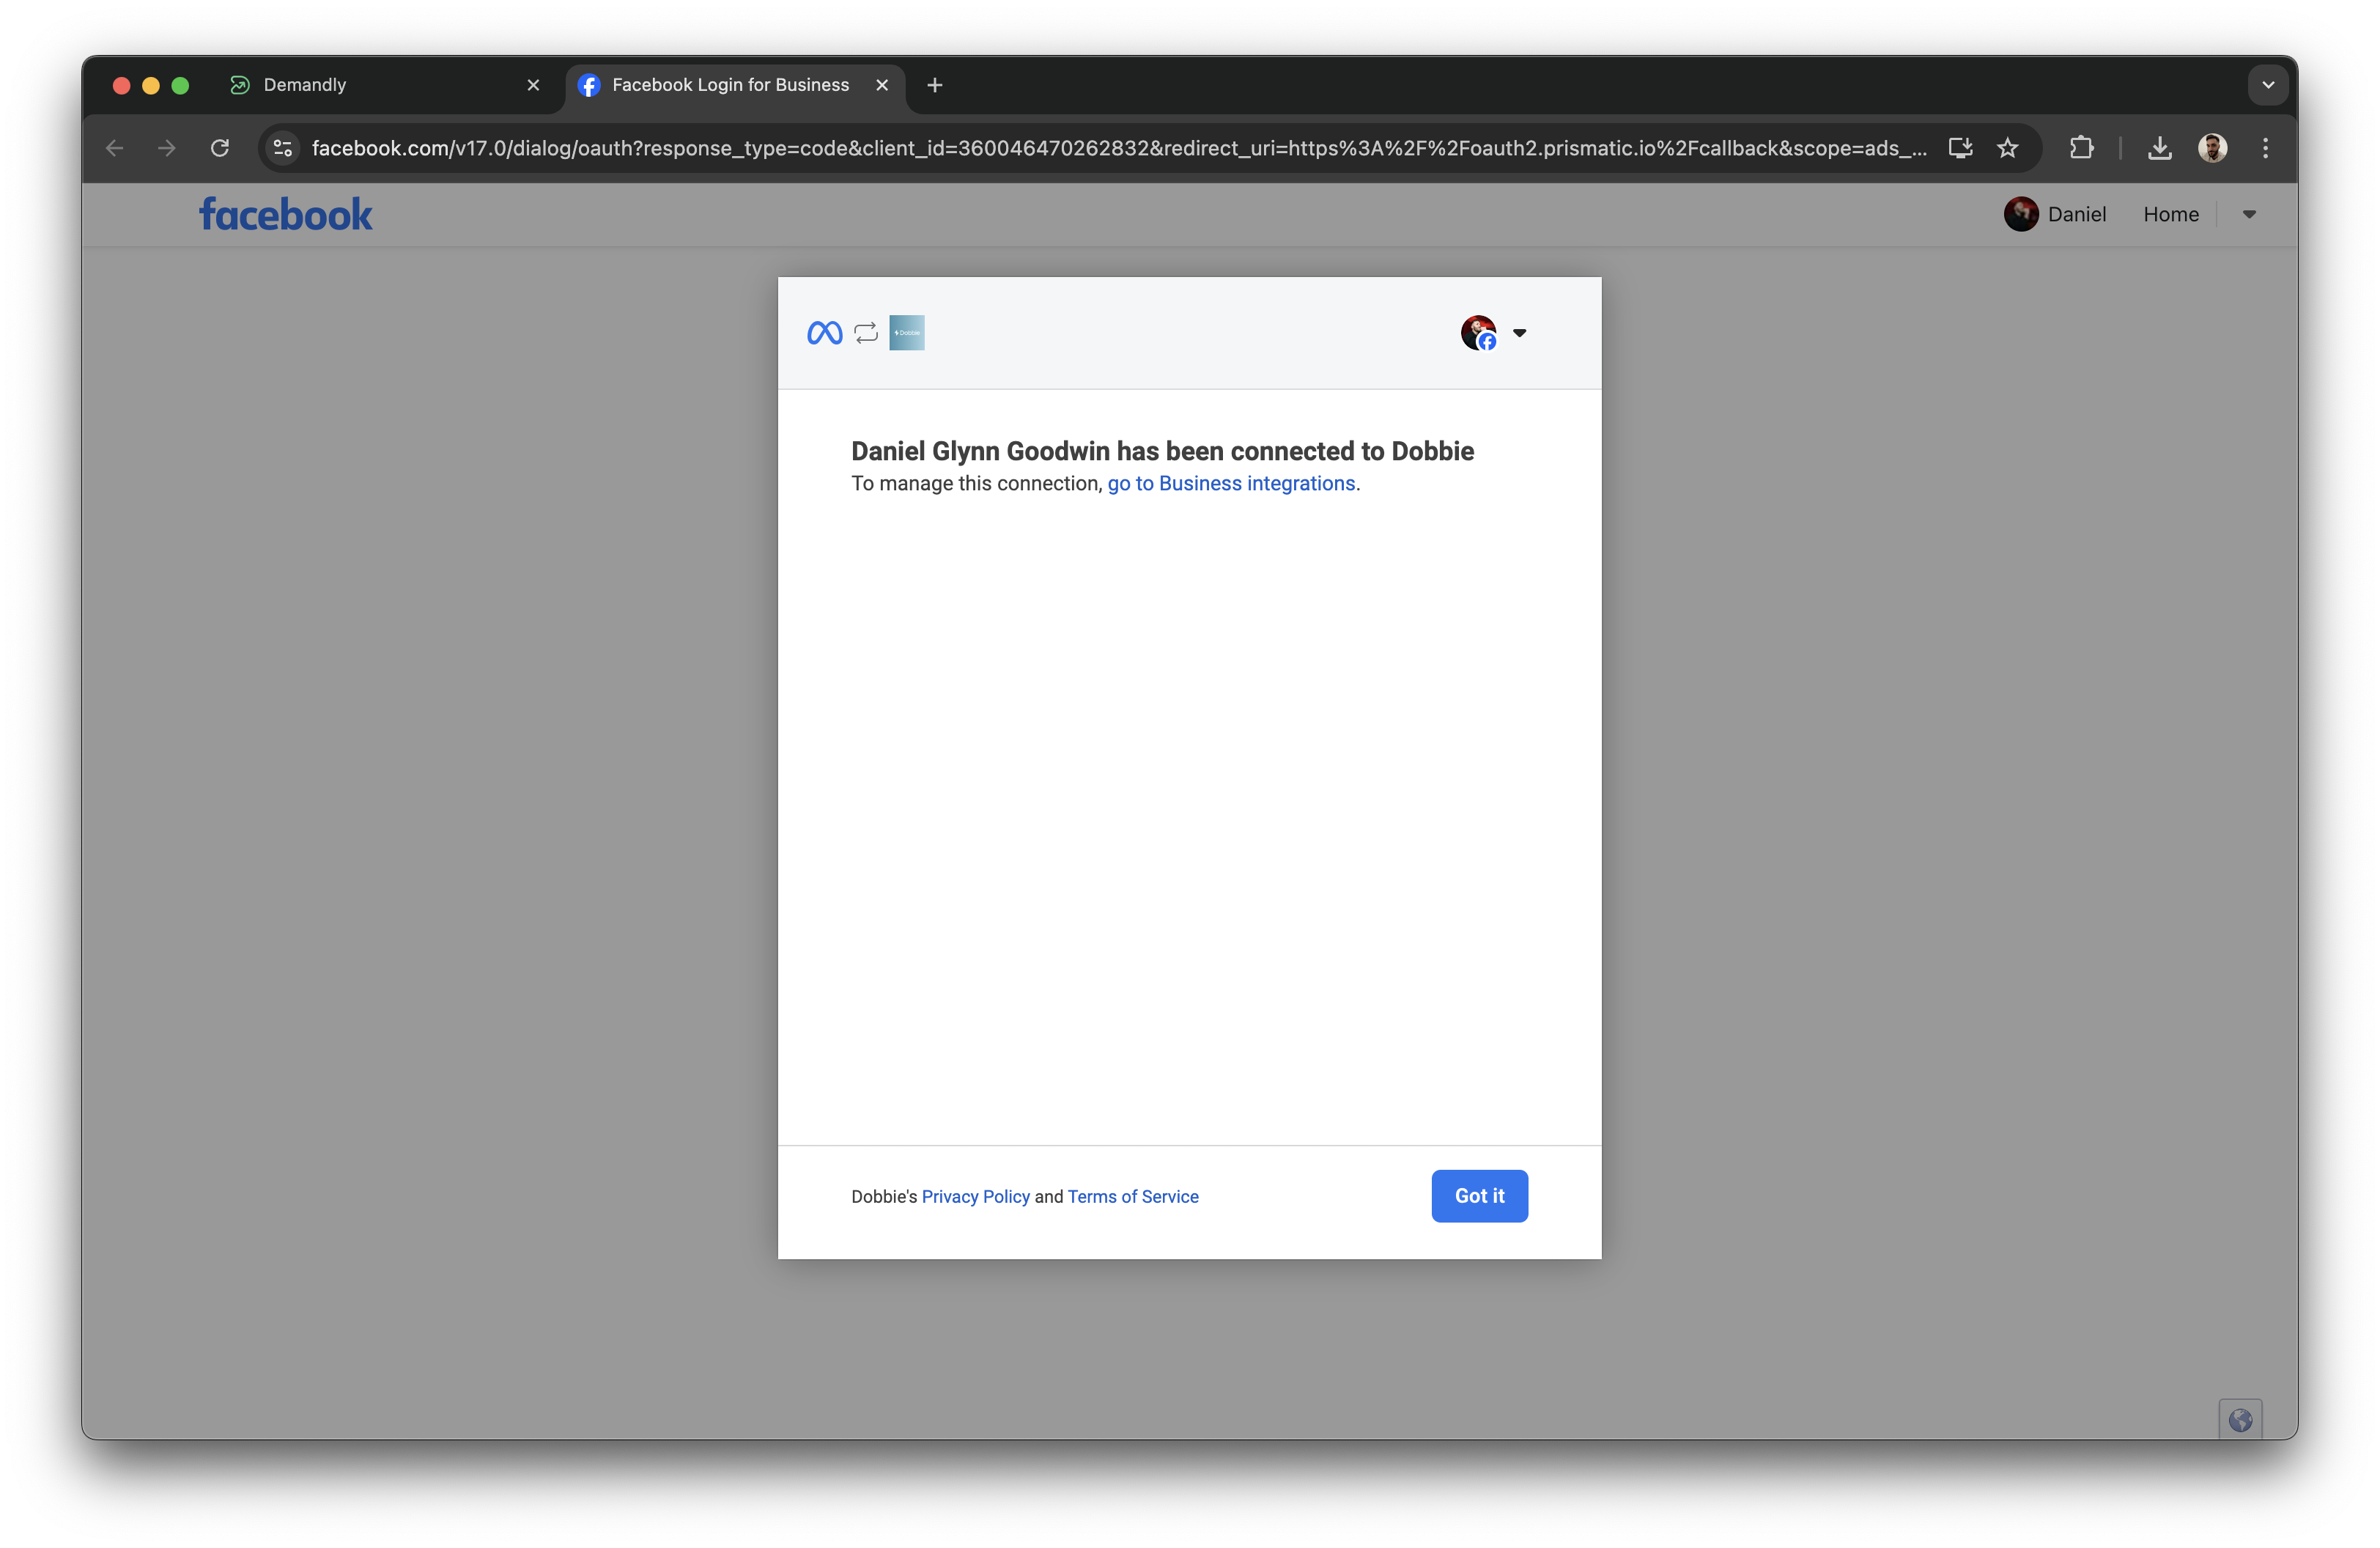
Step 5: Save and confirm
-
Click on “Save”
-
Click on “Got it”
Step 6: Finish the Integration
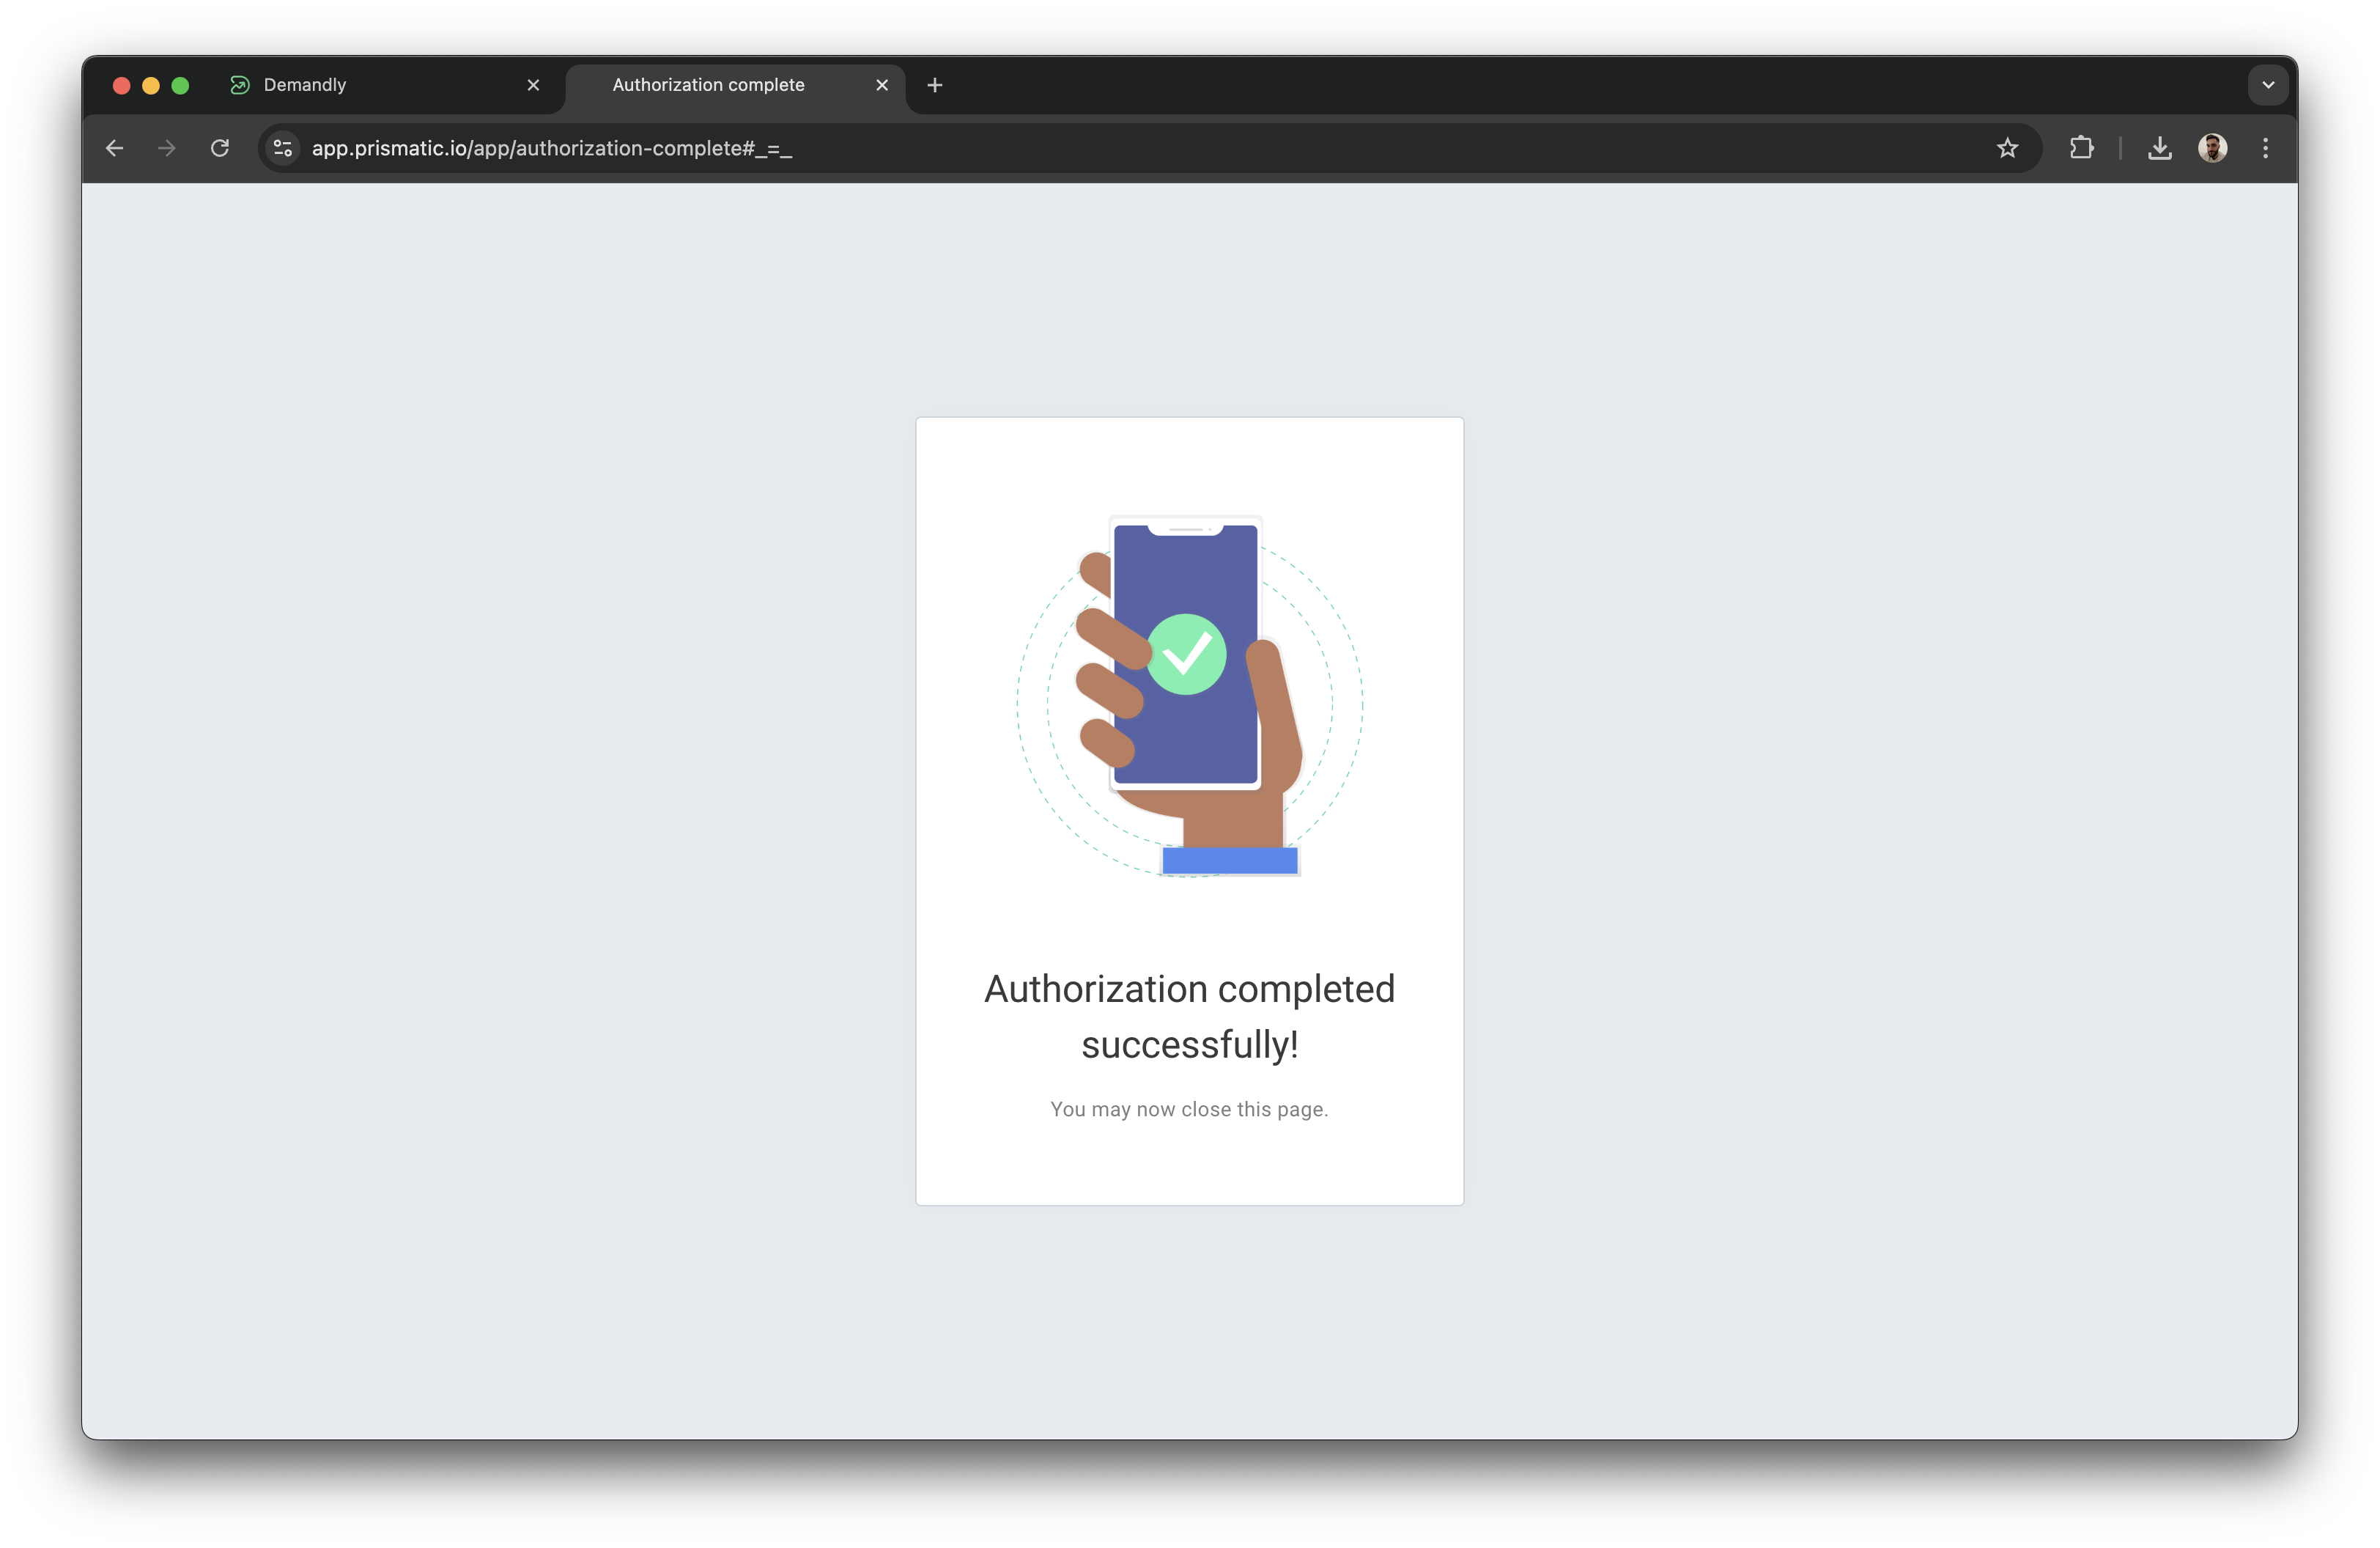
Once you see the “Authorization completed successfully” popup
You can close down this tab and return to the Demandly tab
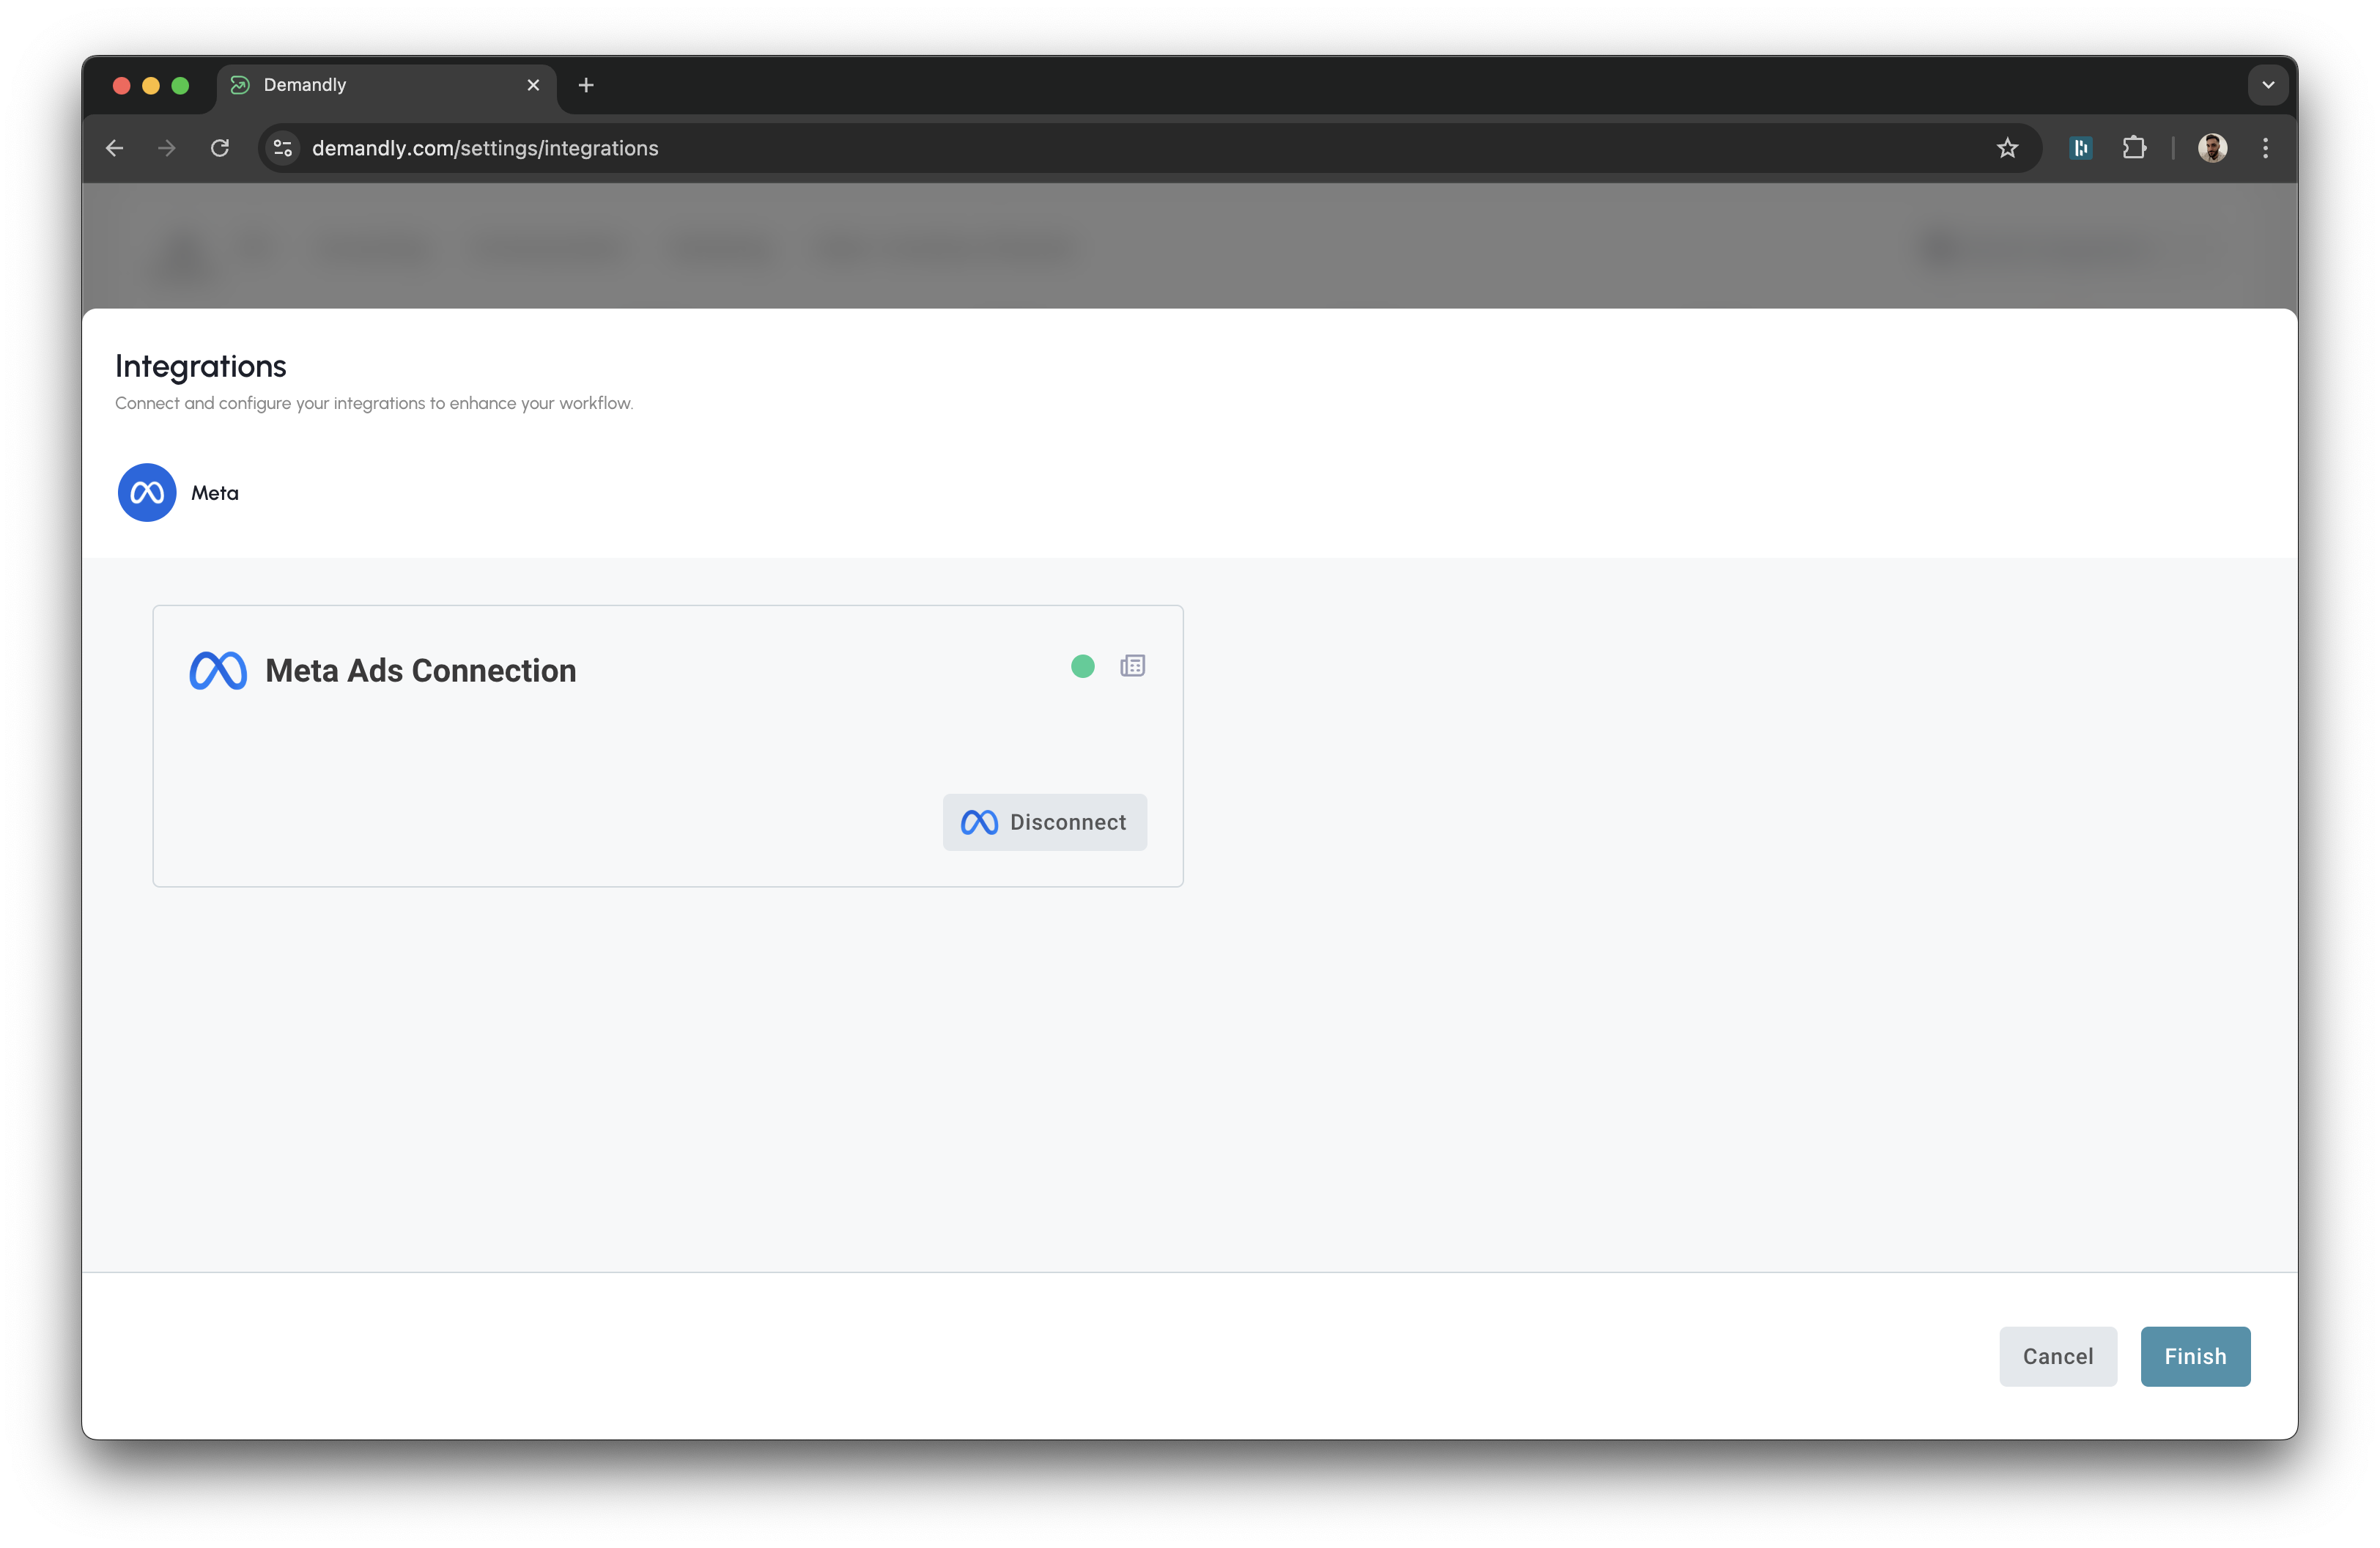
The Demandly tab should then show that Meta is now connected to Demandly. Click on “Finish”
Step 7: Verify Your Integration
You’ll now see a confirmation screen showing your Meta integration status as “Running”. This confirms everything is working properly. Close this window by clicking the X in the top right corner to return to your integrations page.
That’s it! Your Demandly account is now successfully connected to your Meta account.
If you need to make changes to this integration later, you can return to the integrations page and reconfigure or deactivate it as needed.
Need Help?
If you’re experiencing issues with your integration:
- Contact our support team at support@demandly.com